Easy Succulent Pumpkin Centerpiece Tutorial
As we get into the full swing of fall, I am looking for new ways to decorate our beach cottage in a way that celebrates the season while keeping the look relevant to our surroundings. This year I decided to try something a bit different, utilizing my favorite heirloom pumpkins and some beautiful succulents. I photographed the entire process so I could create an easy succulent pumpkin centerpiece tutorial for you to follow. Scroll down to see how easy this is to make and be sure to check out all of the fall arrangements my friends are sharing with me this week.
HERE ARE THE SUPPLIES YOU WILL NEED TO MAKE THIS CENTERPIECE
- A pumpkin that you love – Fresh or Faux
- Sheet moss or Spanish moss…whichever you prefer
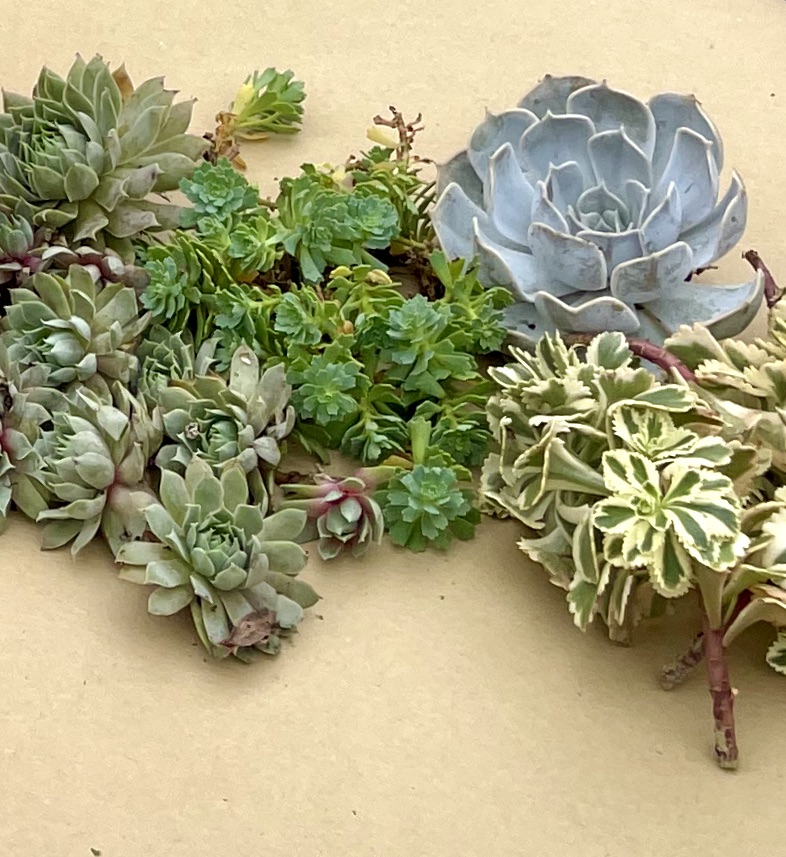
- Several types of succulents, including some trailing varieties
- Dried grasses or flowers
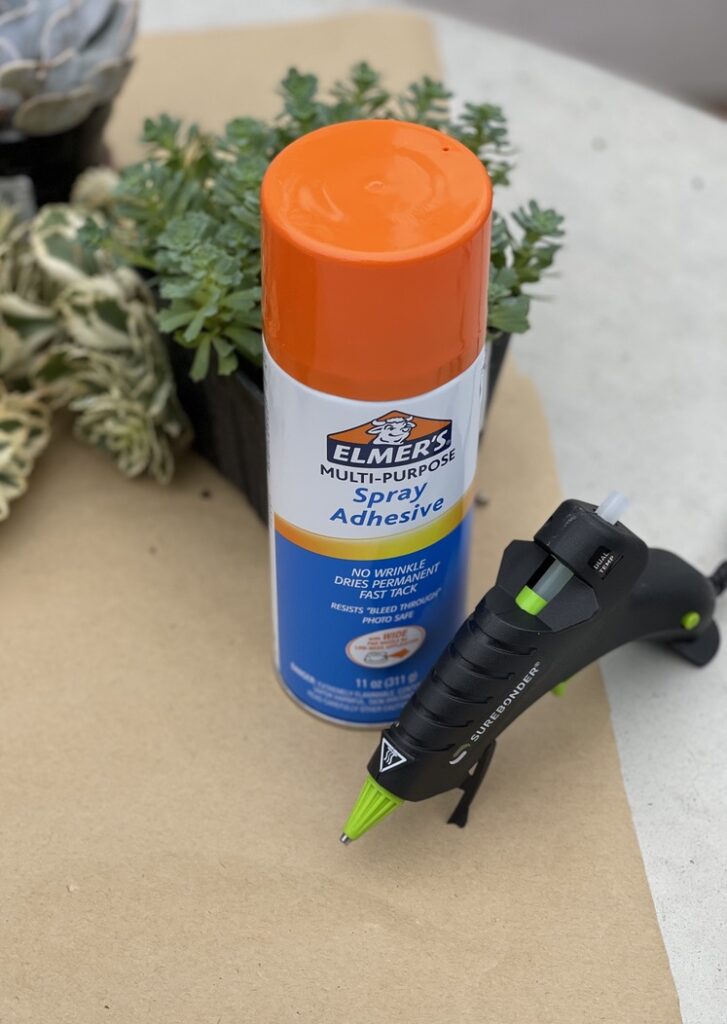
- Spray Adhesive
- A Glue Gun

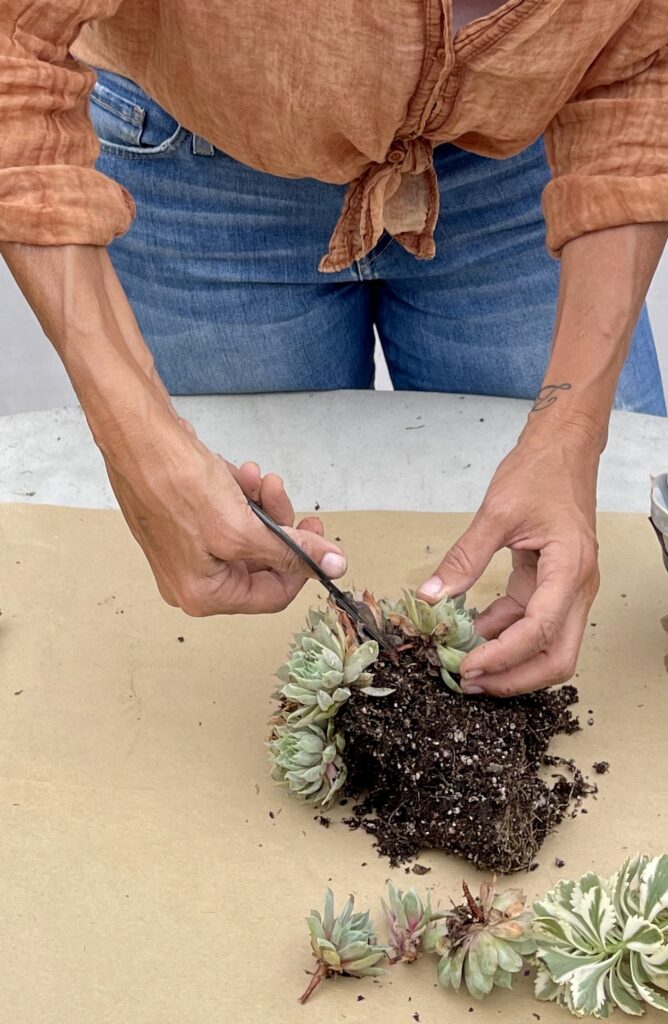
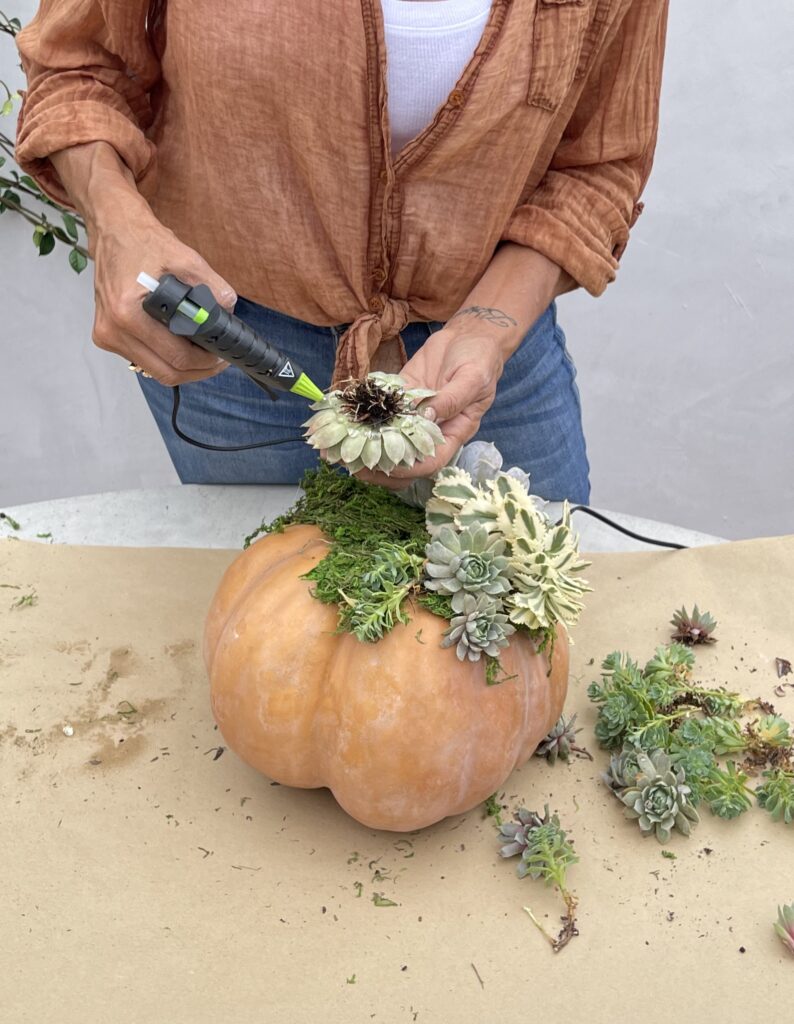
Once you have all of your supplies in hand, the first step is to remove the soil from your succulents and trim them into individual pieces. For larger, single plants, simply remove the dirt and leave the roots.
Once you have all of your succulents cleaned and trimmed it is time to prepare the pumpkin for “planting.” The theory behind this type of succulent pumpkin is that once you place the individual pieces into the moss the succulents will begin to propagate and eventually burrow into the pumpkin for moisture.
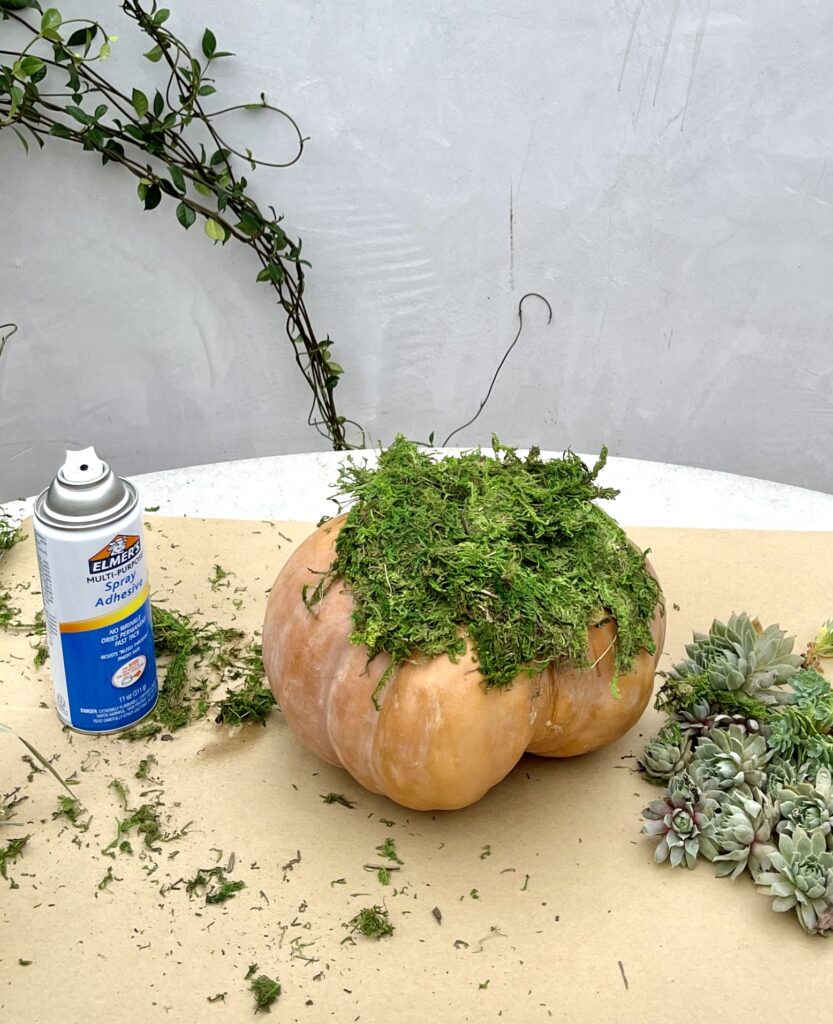
The easiest way to adhere the moss to the pumpkin is to use a spray adhesive. If you are using sheet moss, spray the back side of the moss with the adhesive and then press it firmly onto the top of the pumpkin. If using Spanish moss, spray the top of the pumpkin, then press the moss directly on top.
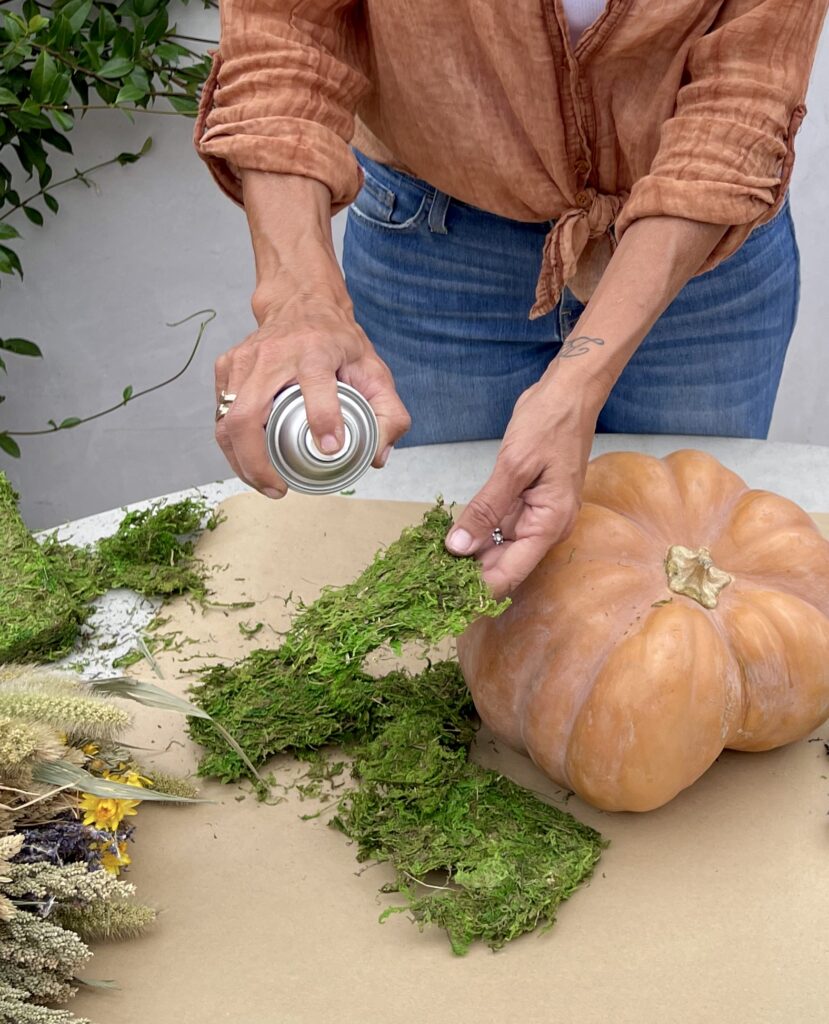
Create a nice full base of moss for your succulents to sit in. Most of the moss will be hidden by the succulents once you plant them.
While it feels strange to hot glue a living plant to an arrangement, I did enough research to know that these succulents are hearty enough to withstand a bit of hot glue on their stem or underside. With that in mind, I began with the largest plant first and bravely added glue to the bottom of the outermost petals. I pressed it firmly to the moss and it held easily.
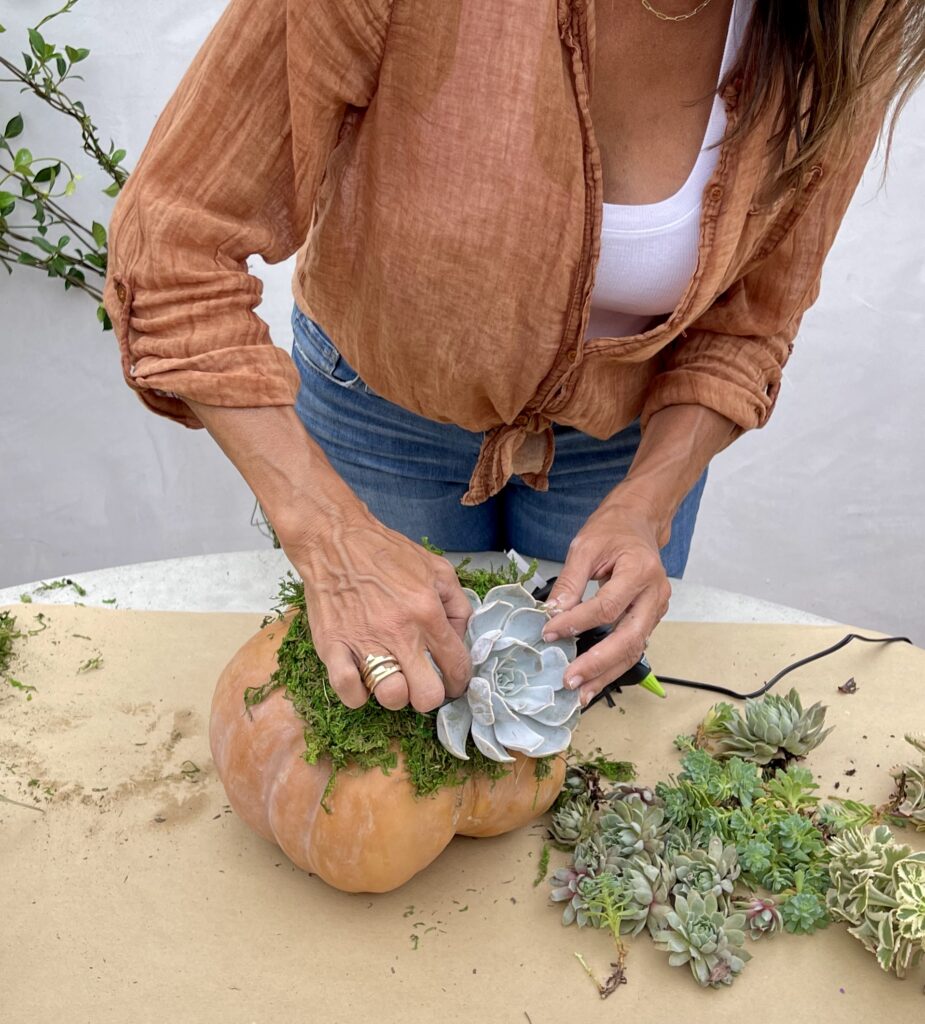
I continued with a long, trailing stem and then added a few smaller cuttings, making sure to tuck them into the moss and under the larger succulent petals.
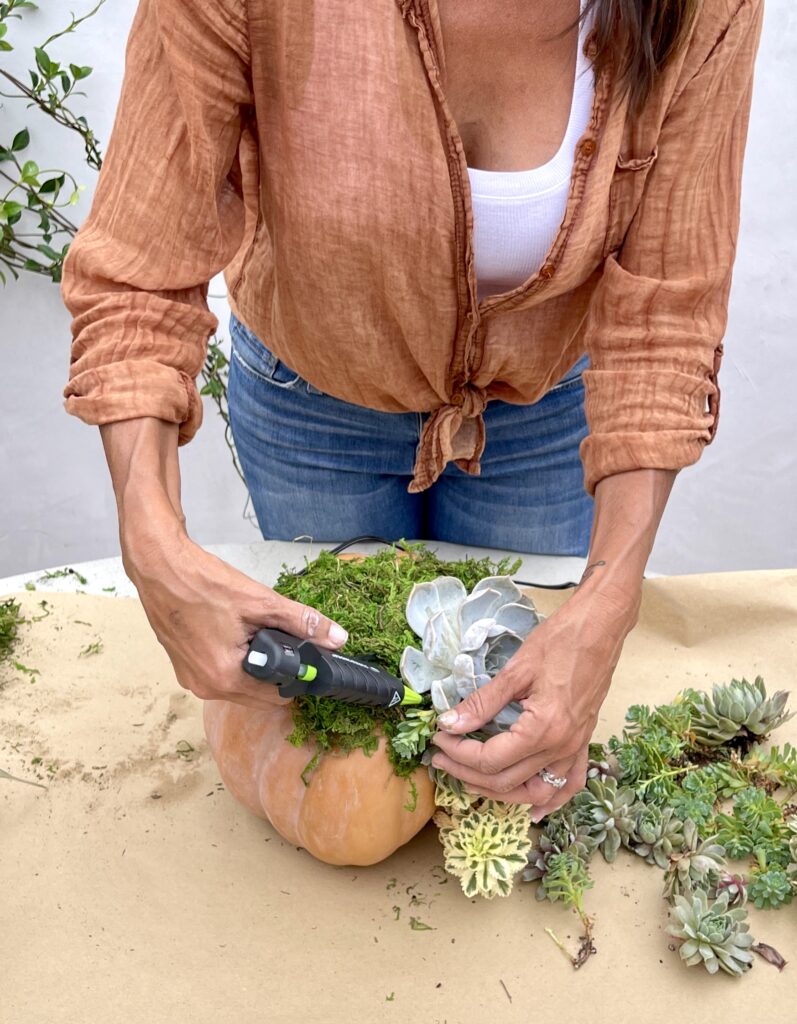
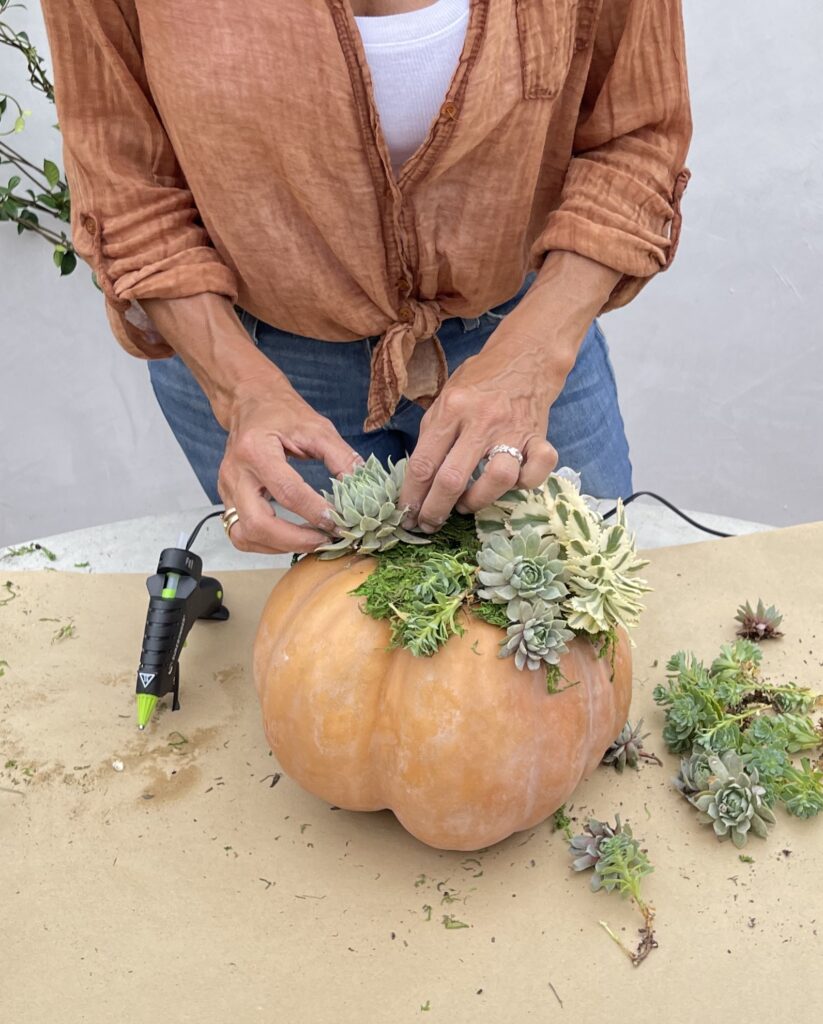
As I gained some confidence, I was bale to quickly fill an entire side of the pumpkin in just a few minutes.
I made sure to allow some of the succulents to trail down the side of the pumpkin to avoid having it look like they were only sprouting out of the top.
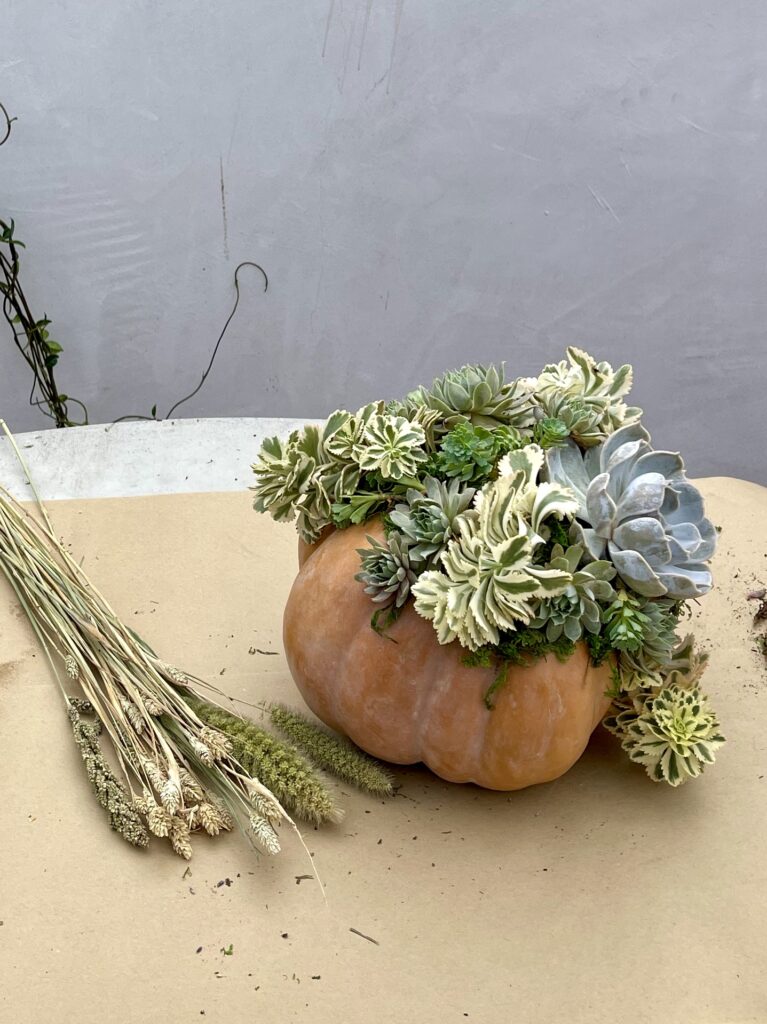
Once I had all of the succulents in place I decided to add a few dried stems of grass, in neutral tones to give the centerpiece even more of a fall look.
Using the same technique, I added hot glue to the stems and tucked them between the succulents and into the moss.
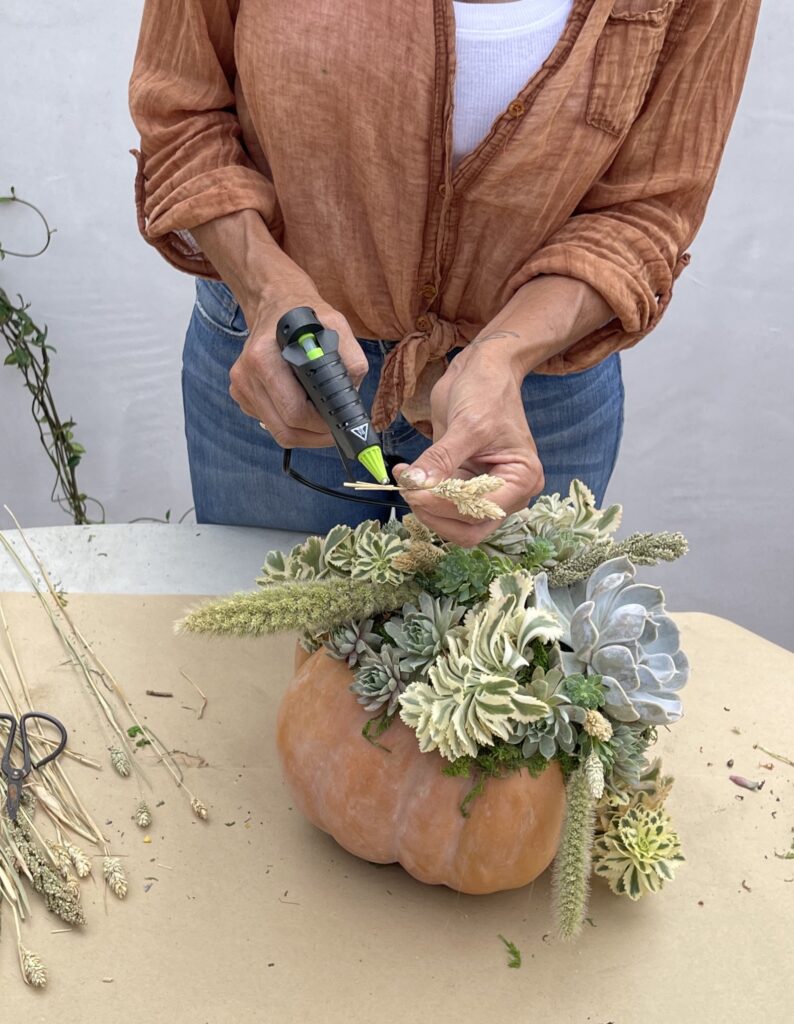
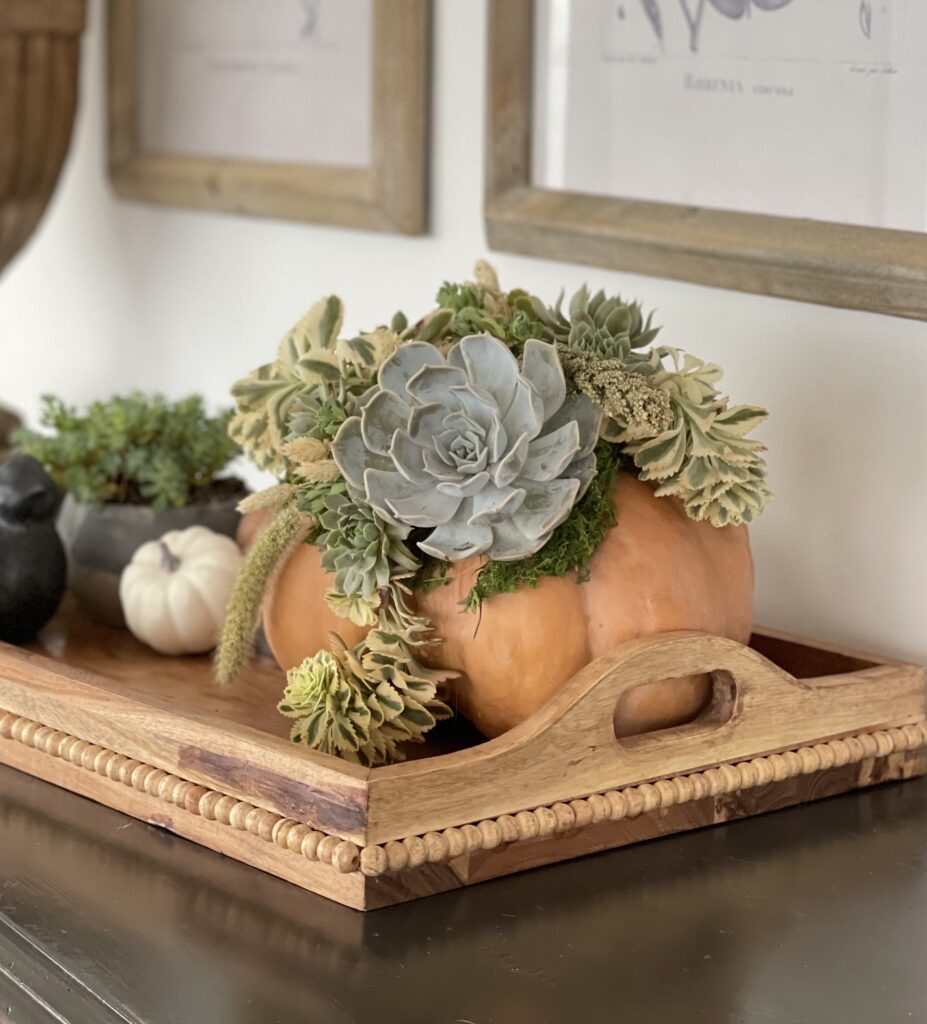
I love how full and mature this succulent “filled” pumpkin looks and the good news is it only took about 20 minutes to make! If you’re looking for a fun fall project, give this a try!
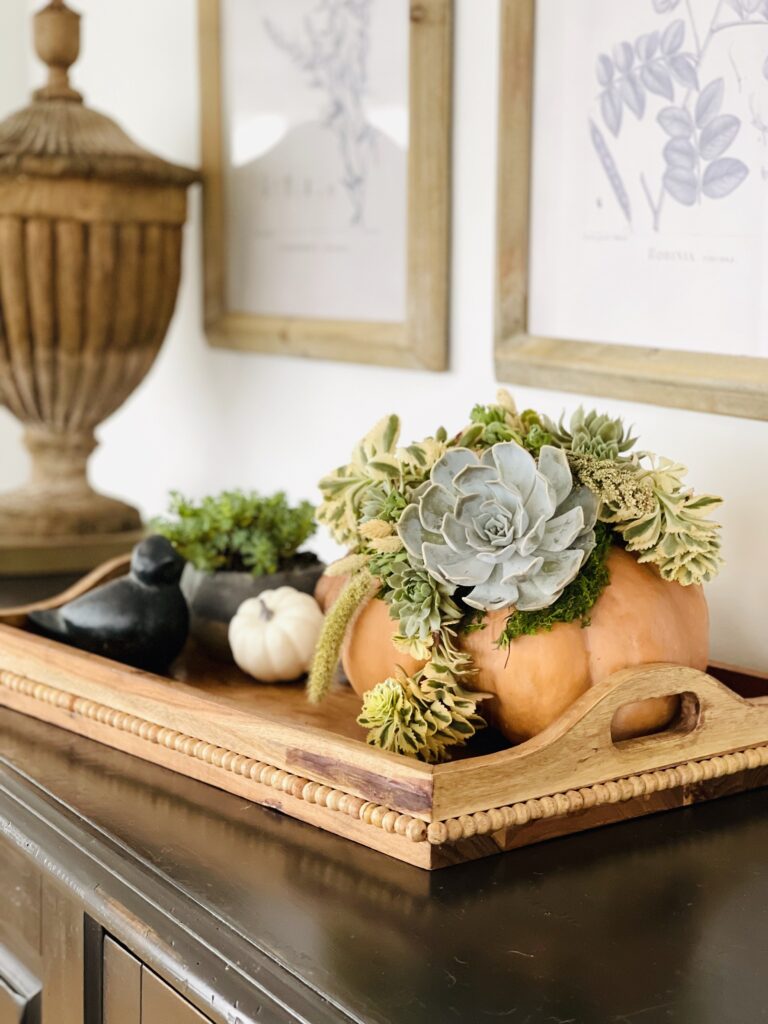
I am keeping this pumpkin on the sideboard in my dining room for now, but will definitely be using it for a Thanksgiving centerpiece on the holiday.
If you’re looking for more fall flower-arranging inspiration, scroll down to see what my friends have created! They are all so talented and have some great ideas for you!


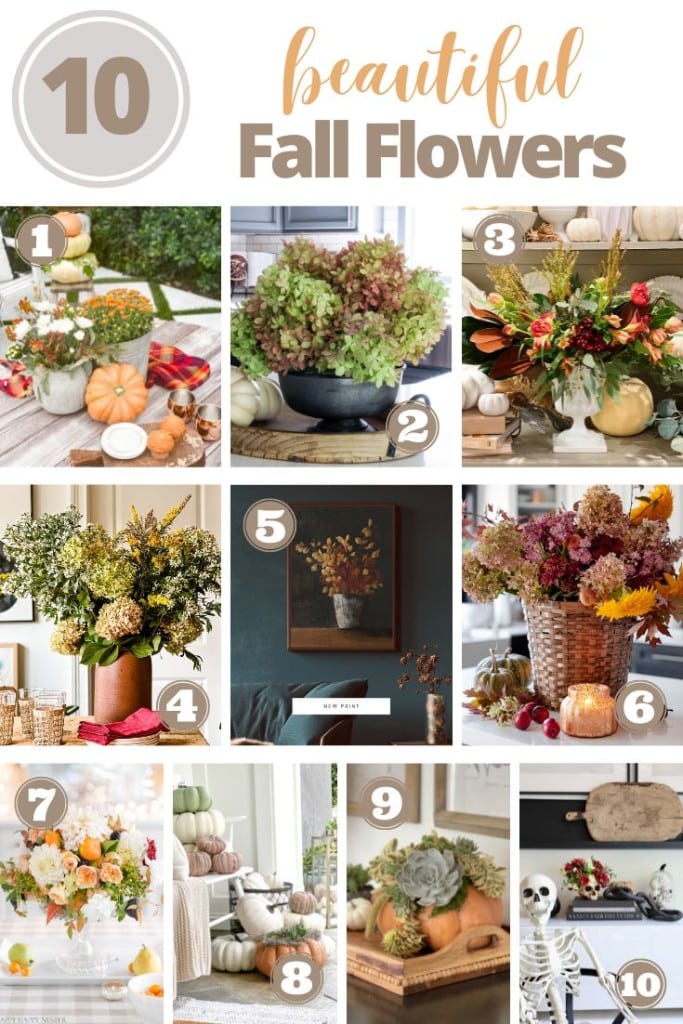
Blogger’s Best Flower Arrangement
- 7 Ways to Make Your Fall Flowers Amazing | Robyn’s French Nest
- How To Dry Limelight Hydrangeas | Inspiration for Moms
- Fall Table Centerpiece for a Gathering | My 100 Year Old Home
- Easy Foraged Arrangement for Fall | Most Lovely Things
- Fall Flowers Printable Art | Twelve on Main
- Rustic Fall flower Arrangement | Craftberry Bush
- Flower Arrangements with Fruit | Happy Happy Nester
- Three Effortless Ways to Use Fall Flowers in Your Home | Pasha is Home
- Easy Succulent Pumpkin Centerpiece Tutorial | Sanctuary Home Decor
- DIY Floral Skull | My Sweet Savannah
I love how beautiful your pumpkin succulent turned out! You have some healthy and beautiful succulents in your garden! Thanks so much for joining us on this fun fall floral blog hop!