How to Make this Centerpiece plus an Easy Spring Tablescape
Hi all and welcome back for another week of Friday Flowers! To start I want to say, “YAY! I’m so happy its officially spring!” I LOVE this time of year because it means all of my FAVORITE flowers are available! So to celebrate a new season, this week I’m sharing simple step by step instructions on how to make this spring centerpiece. Plus I’m sharing all of the details about the tablescape I created for a family party using this arrangement.
It would be the perfect centerpiece for an Easter tablescape or spring party!
LET’S GET STARTED!
HERE IS WHAT YOU’LL NEED TO MAKE THIS ARRANGEMENT
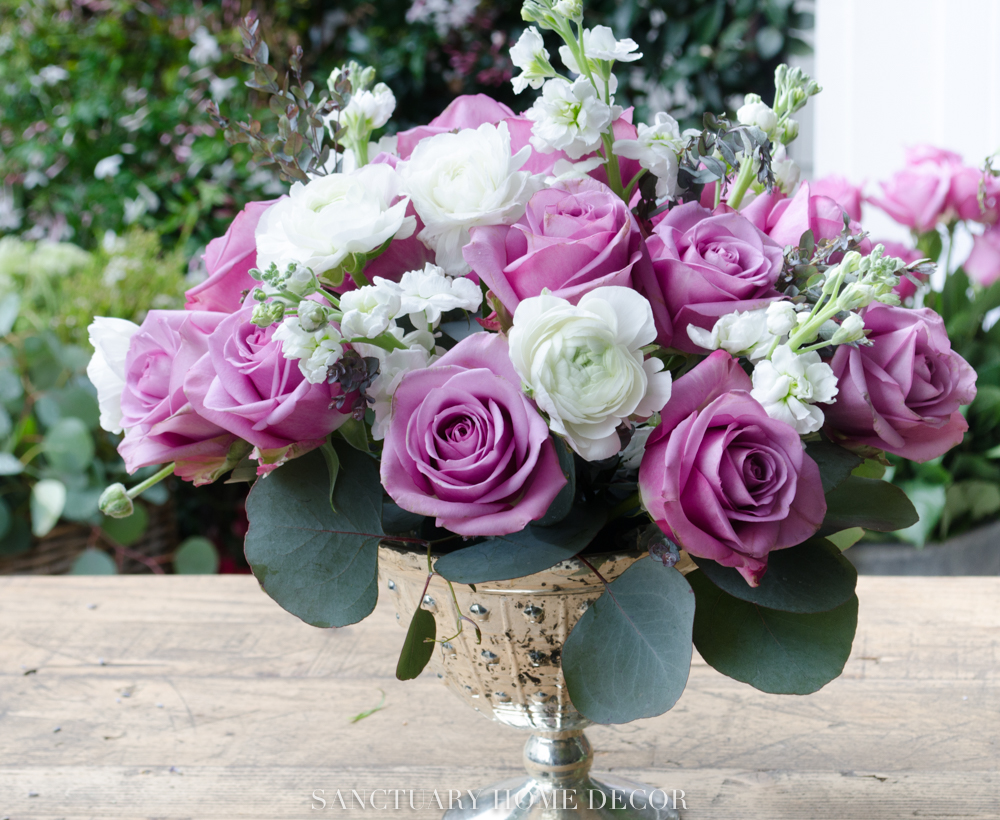
1. A footed bowl or compote. I used this mercury glass one because it has such a lovely vintage look and I knew I wanted to use my mercury glass votive candles. I’ve linked it below along with some other options.
2. Wet Floral Foam. I used Oasis, but you can use any brand.
3. Flower Trimmers
4. Flowers – Detailed Below
FLOWERS
A QUICK NOTE ABOUT FLOWERS: Use anything works with your color scheme. I know it’s a little bit early in some areas to start getting some of the “fancier” flowers, so don’t worry If you can’t find these exact blooms…As long as you have greens, roses and one or two other flowers, you should be able to get a similar look.
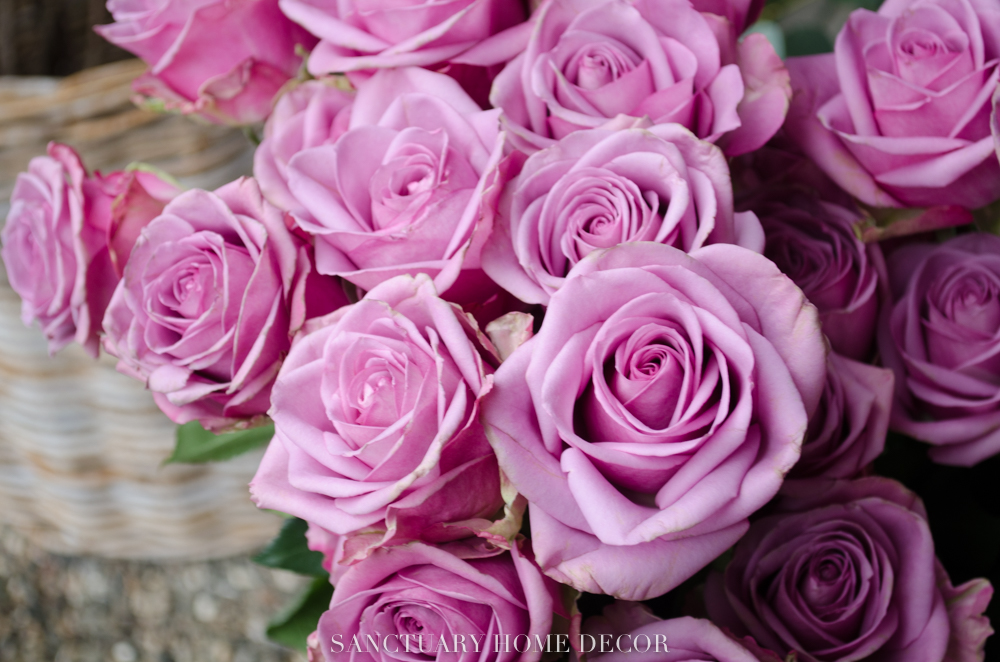
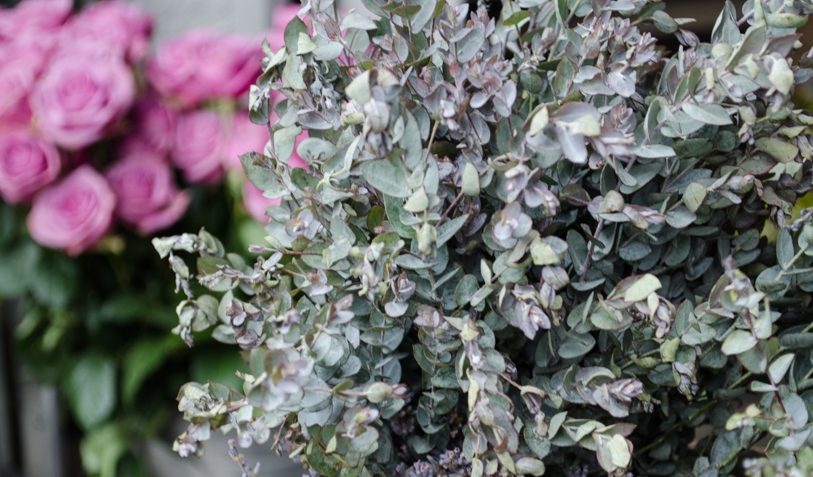
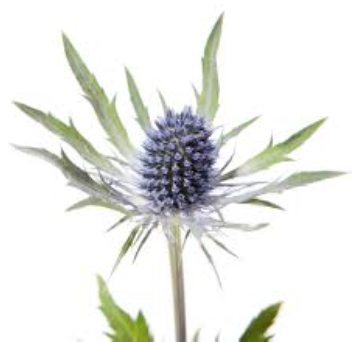
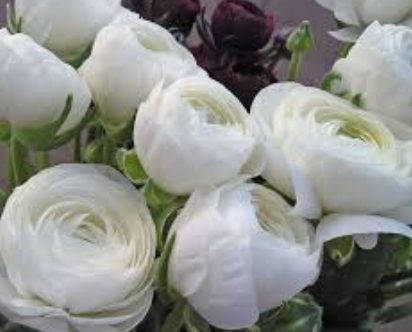
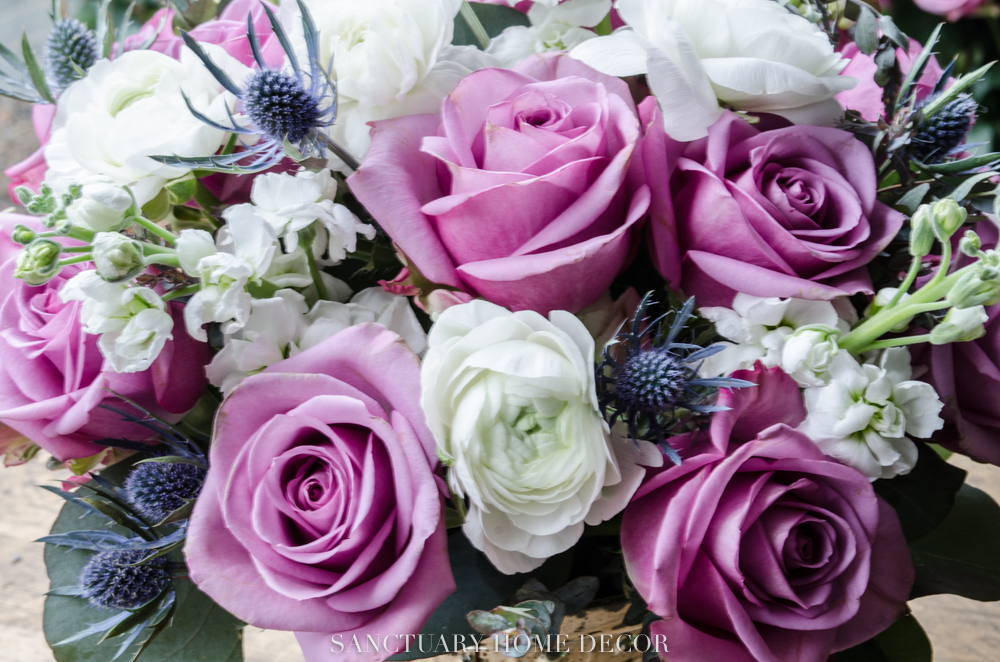
HERE’S WHAT I USED: Silver Dollar Eucalyptus – Cool Water Roses – Bonsai Eucalyptus – Blue Thistle – White Stock – White Ranunculus


{STEP 1}
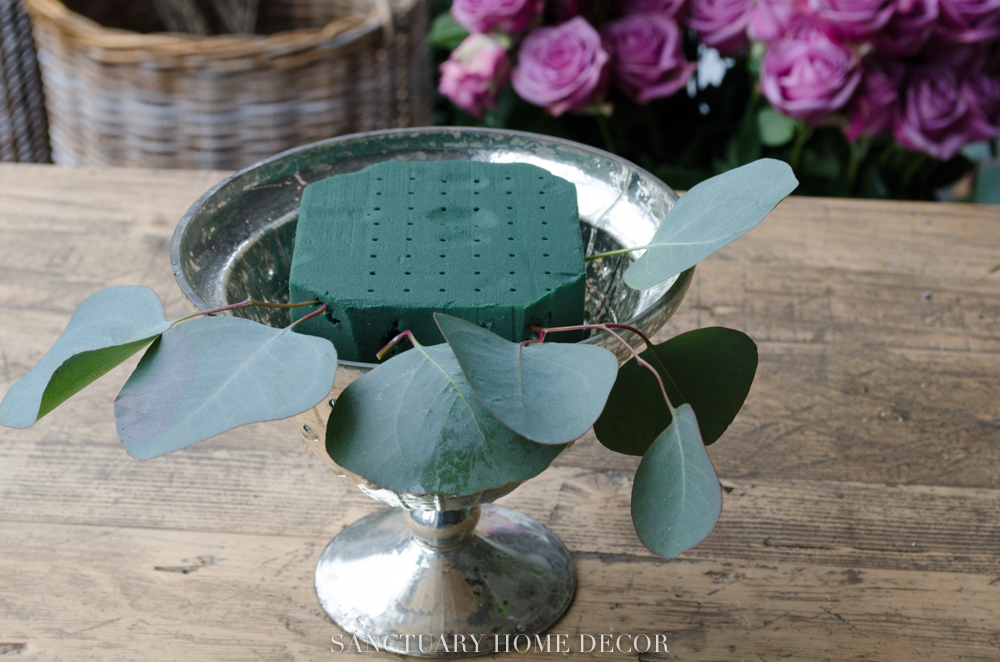
ADD FLORAL FOAM TO YOUR CONTAINER
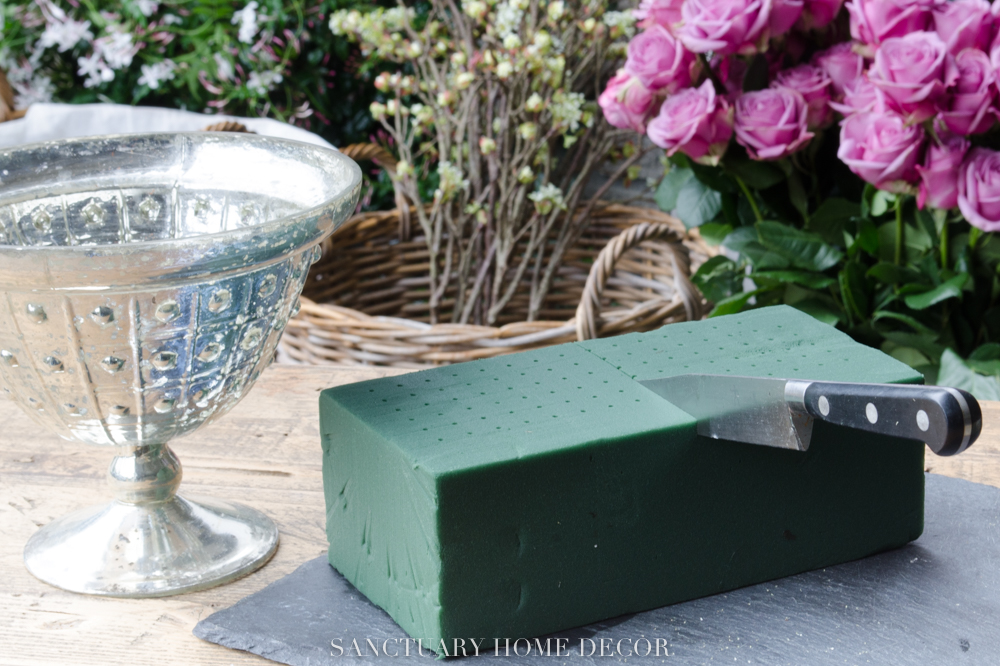
If you have never used floral foam before, don’t worry…it is SUPER EASY!
Here’s what you need to know: Soak the foam in a sink or bucket until it is fully saturated. You will know it is soaked through when it is heavy and sinks to the bottom. The easiest way I have found to cut floral foam is with a kitchen knife.
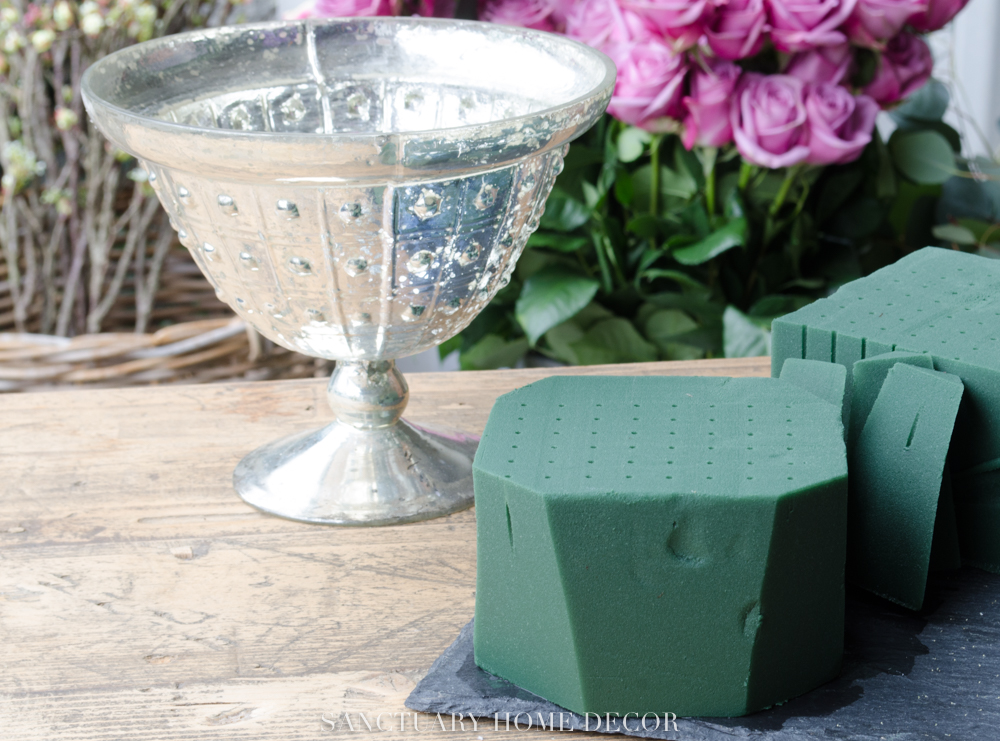
If your container is round, shape the foam with your knife to fit snugly in the container. It should sit just below the top lip when you place it inside.
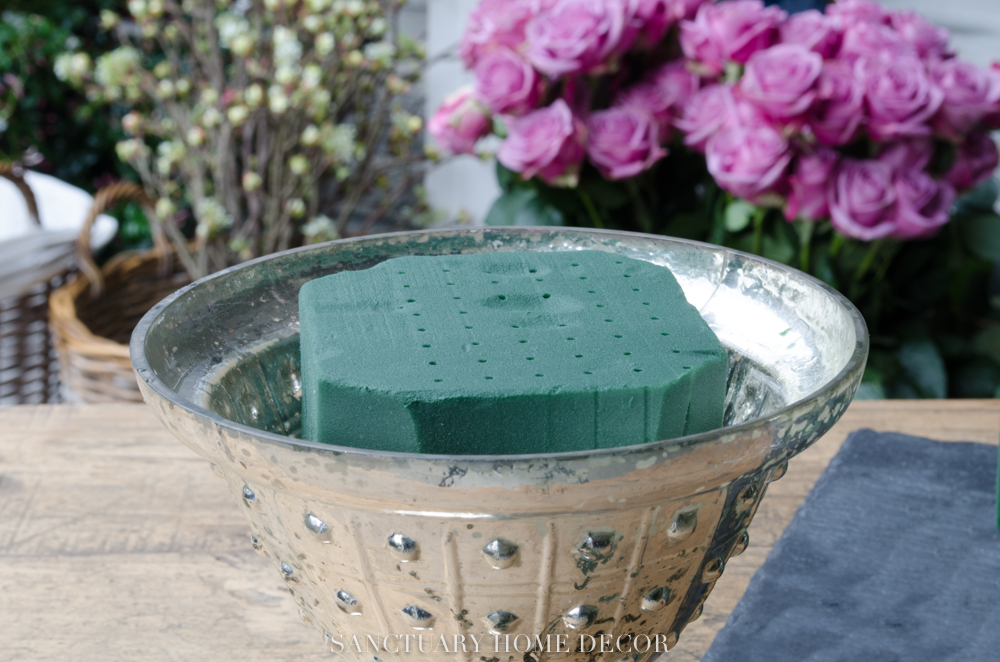
At this point, I know many professional florists would use clear floral tape across the top of the container to keep the foam in place. I have never done this, simply because I am not transporting them very far. I do like to add an inch or two of water to the bottom of my container to keep my flowers fresh longer.
{STEP 2}
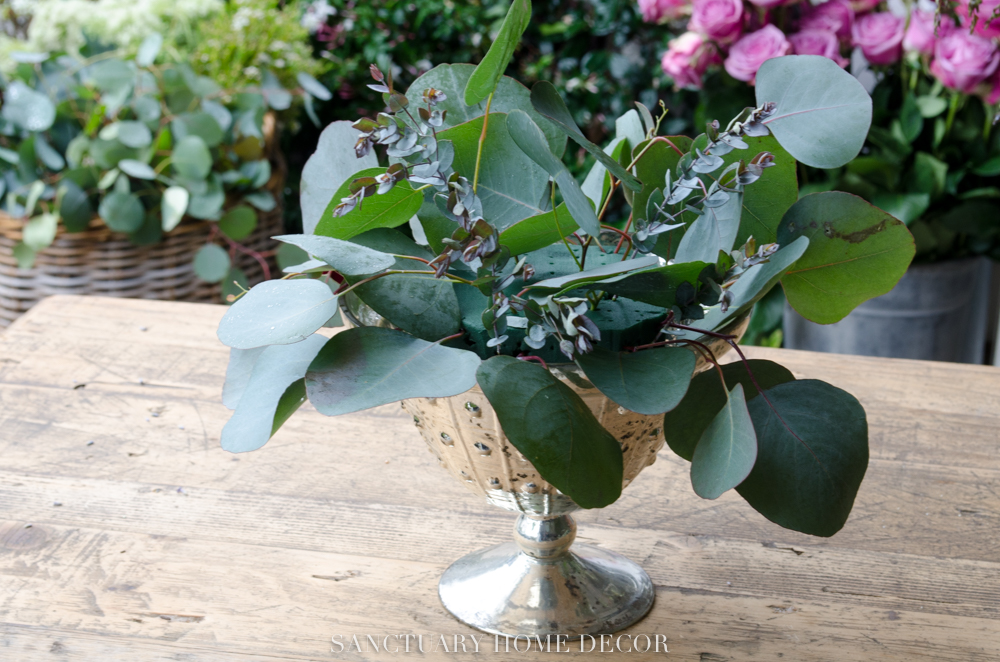
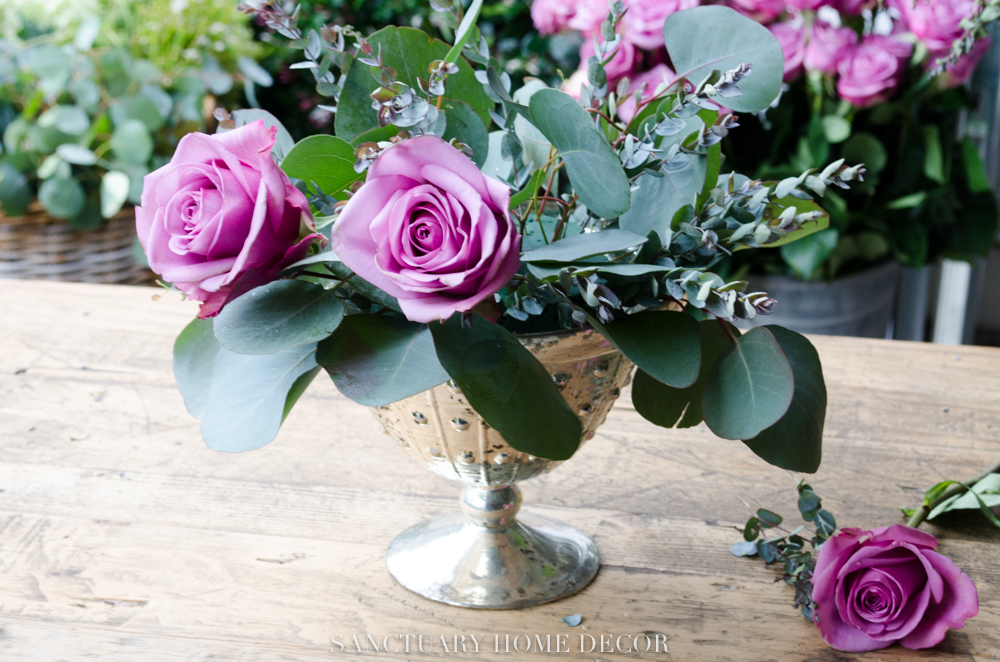
MAKE A BASE OF GREENERY
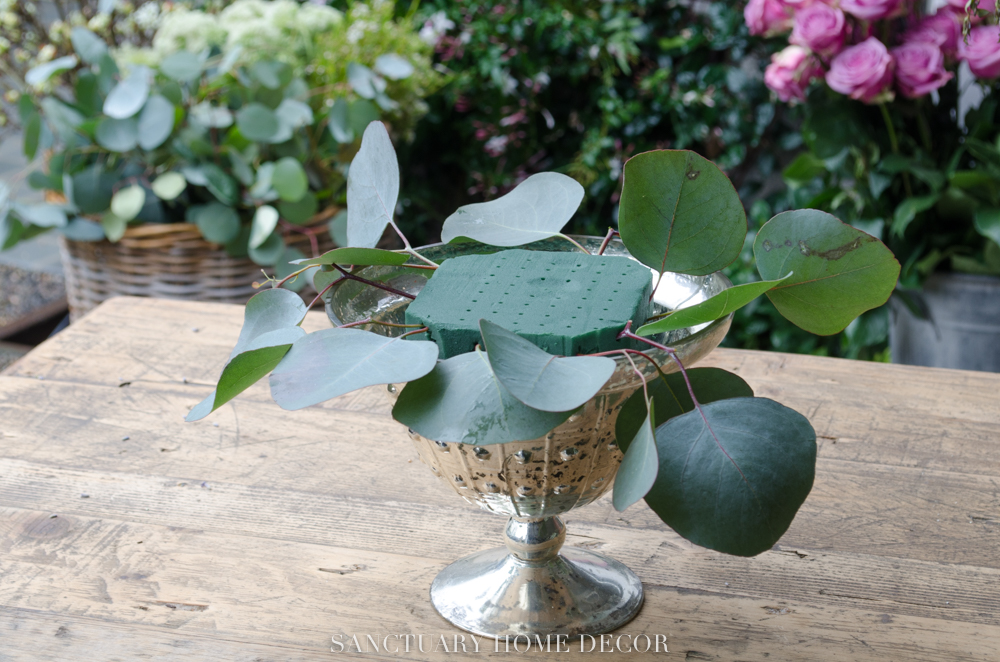
Once your wet foam is in place, it’s time to create the “base” of your arrangement. The best way I have found to do this is to begin inserting small stems of greenery into the foam so that it overhangs the edge of the container. In order to get stems long enough, you will probably have to remove some of the lower leaves from your greenery.
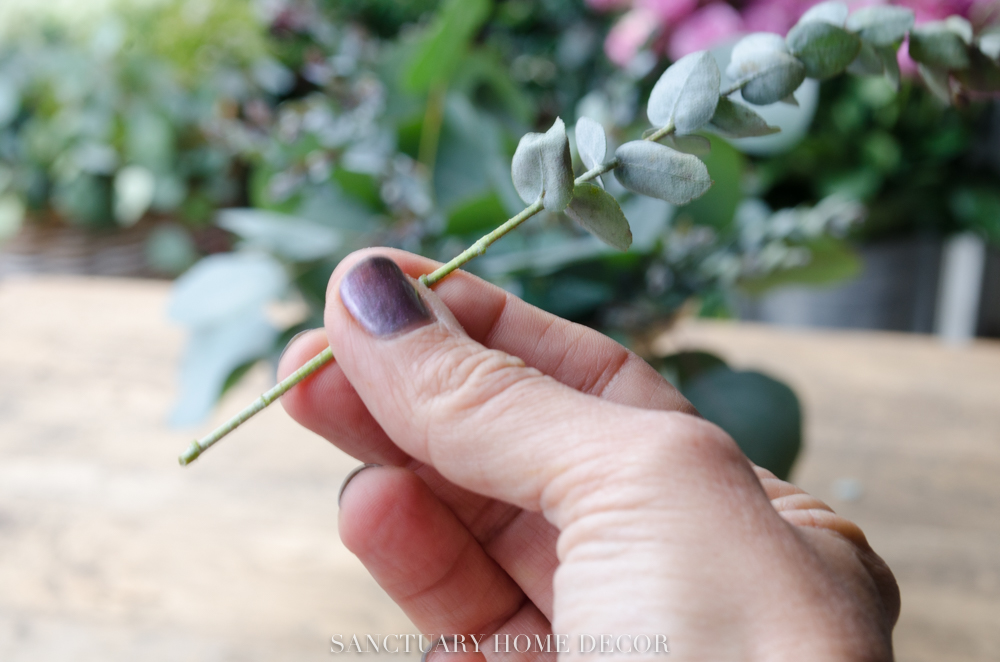
I took the lower leaves off of this bonsai eucalyptus so I had a good stem to insert into the foam.
Once you have added the greens around the edge, you can place a few in the center to create a complete base. Because I used two kinds of greenery, I mixed them in randomly.
{STEP 3}
ADD YOUR FLOWERS
The key to adding your flowers is the angle.
Once you have your base the next step is to add your flowers. I like to start with the largest flowers first. The stems MUST go in at an angle along the edge of the container. The creates the proper shape. If you insert them too upright, your arrangement will not have that nice full “circular” shape.
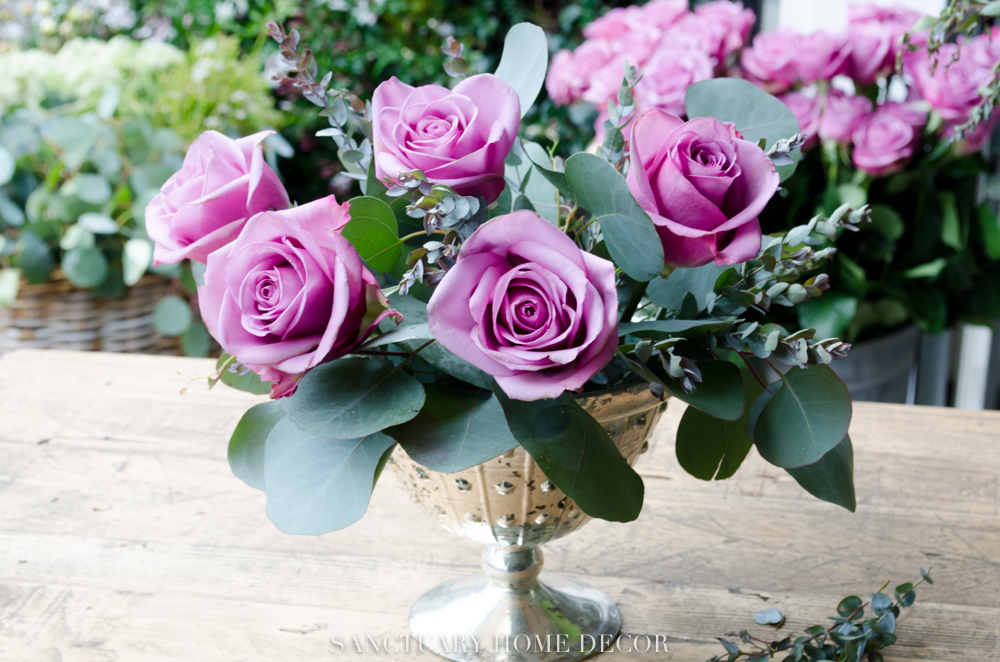
I put all of my roses in first (about a dozen) and made sure the overall shape looked right. I also try not to take the flowers out and reinsert them too much. This will create tot many holes in the foam and you flowers will not stay in place.
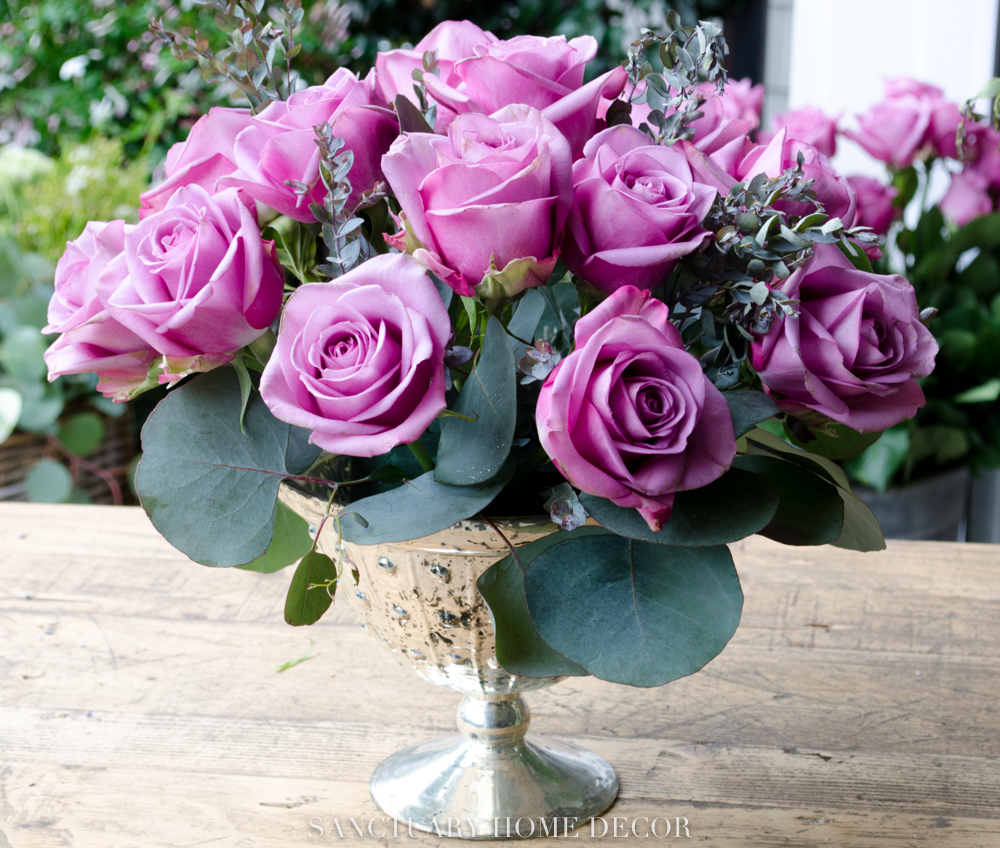
I considered stopping right here because I love the simplicity of roses and greens, but decided I wanted to lighten it up with some white blooms.
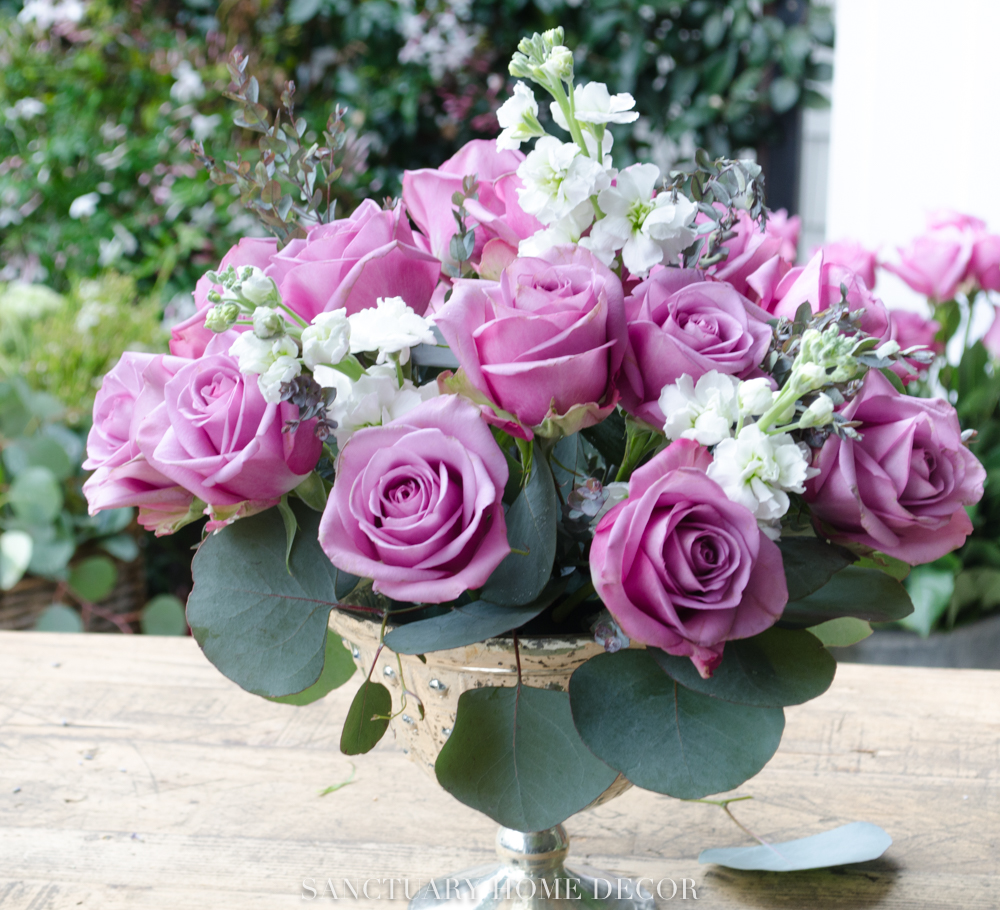
I removed all of the leaves and some of the lower petals from the stock before inserting them.
Once I got the roses in place, I began to fill in some of the gaps with the ranunculus and stock. As I added the white blooms, I made sure to angle them to keep the continuity of the shape. I added about 5 stems of stock and then added about 7 ranunculus stems.
Because I knew I would be using an indigo colored table cloth, I want to incorporate just a touch of that color in my arrangement, so I added a few stems of blue thistle.
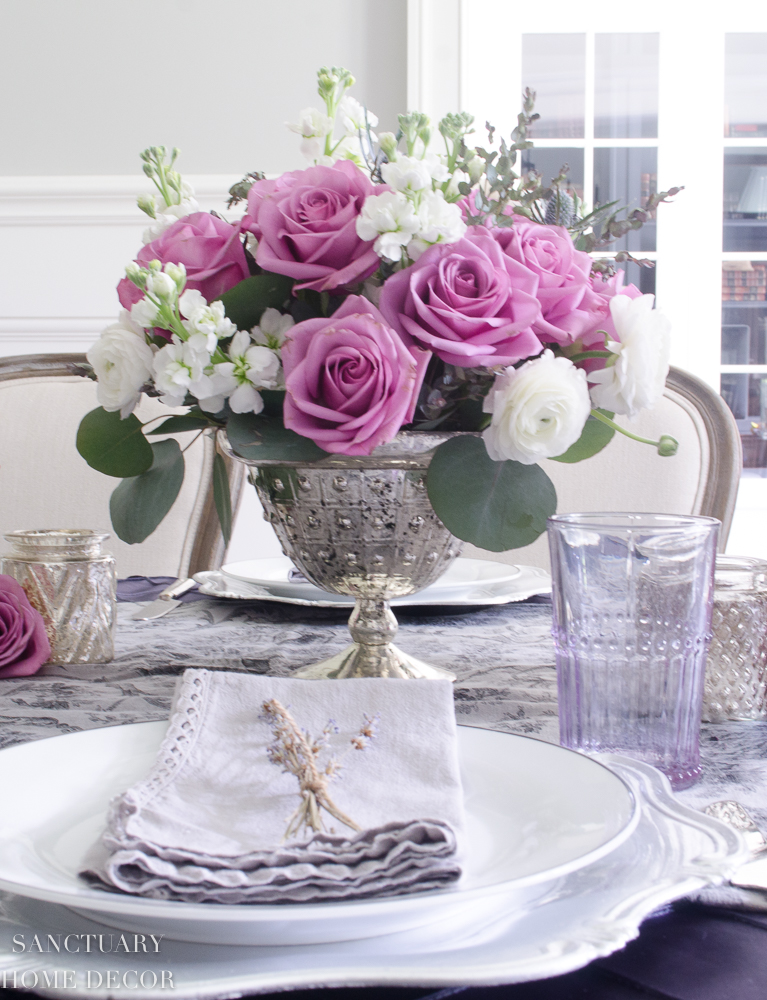
And Voilá-A Pretty Spring Centerpiece!!
SETTING THE TABLE
We had a super long table that night for all of our guests, so I made two smaller arrangements to flank the larger one. I also included my favorite mercury glass votive holders. The give off such a pretty light when they are lit! I also placed a few of the extra rose heads next to the candles.
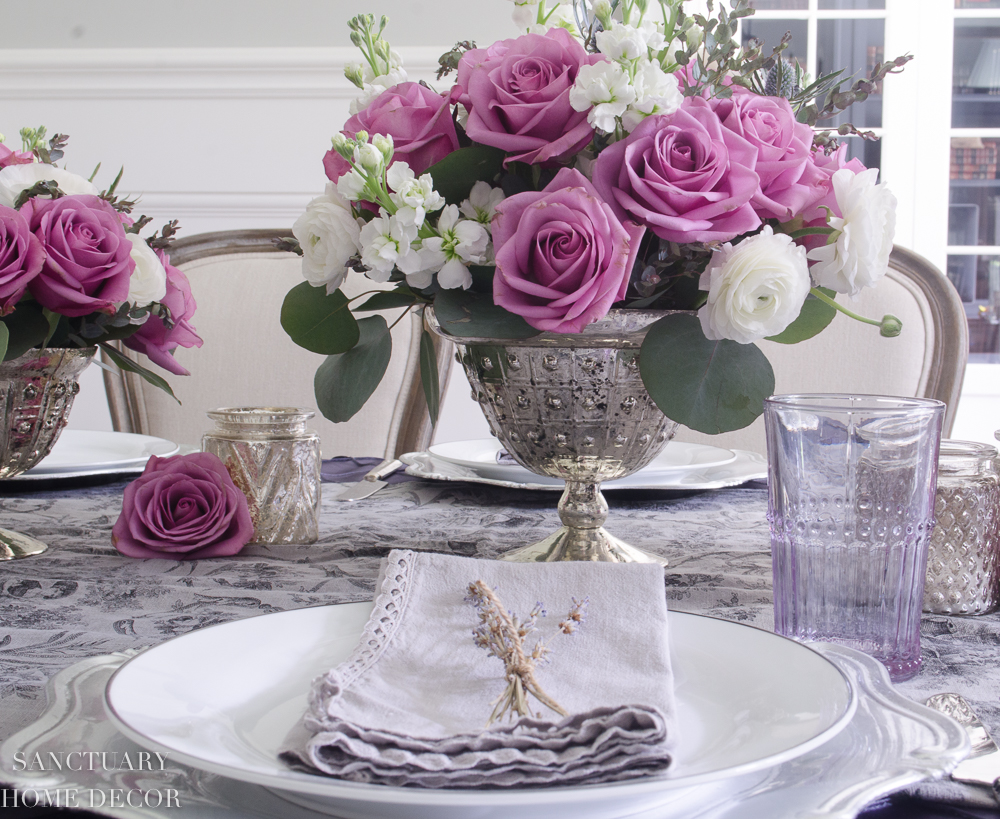
I used that indigo pintuck table cloth I mentioned and added a charcoal and black toile runner (Okay really a folded piece of fabric I got at Joann, but no one noticed!)
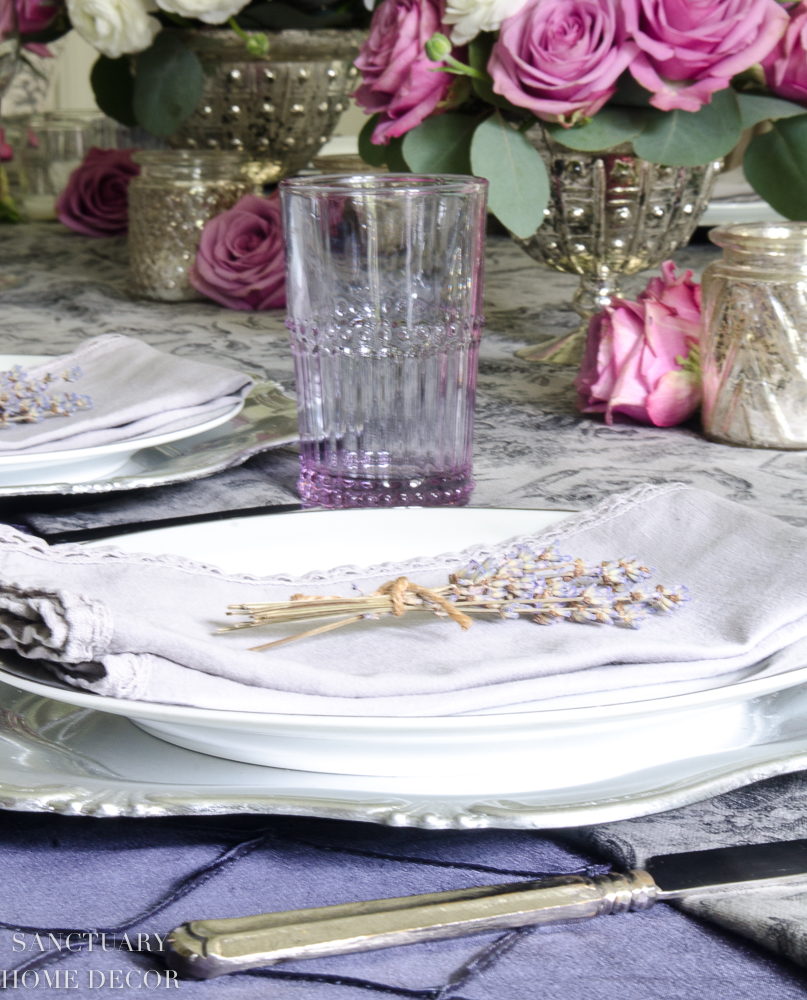
For the place settings, I used a silver charger and my basic white dishes and then added my favorite lavender glasses. Aren’t they so lovely!? Finally, I tied up a few sprigs of fresh lavender with a simple piece of twine and placed them on each napkin. Noting complicated or incredibly time consuming here…just a pretty table to enjoy with family!
If you have any celebrations coming up, this is a super easy centerpiece to make in less than 30 minutes.
I would love your feedback if you try this centerpiece! Leave a comment below or send me an email!


Thank you for the excellent post
OOH I can almost feel the knife going through the oasis in that picture… is it just me or is that one of the most satisfying feelings? Love the vase, love the arrangement and love the place settings! you have put my dining table to shame.
Haha! Yes Kelsey…that oasis gets me every time!! Thanks so much for your comment! Appreciate it!