Garden Container Planting Tips
Hi you guys! I hope you’ve all had a good week! This week, while I was out in the yard working on a little patio makeover, I realized that our all of our potted garden containers are in desperate need of a makeover as well. I was thinking that planting flowers in garden containers is really not altogether different than arranging fresh cut flowers in a vase, so this week, I thought I would show you how I create lush planted containers for our yard.
I shop at the nursery with the same eye as when I’m buying fresh flowers. I am looking at shapes, sizes and colors that mix together well. I don’t always have a container in mind when I am choosing my plants, so I try to get a combination of tall, medium and low plants in complimentary colors.
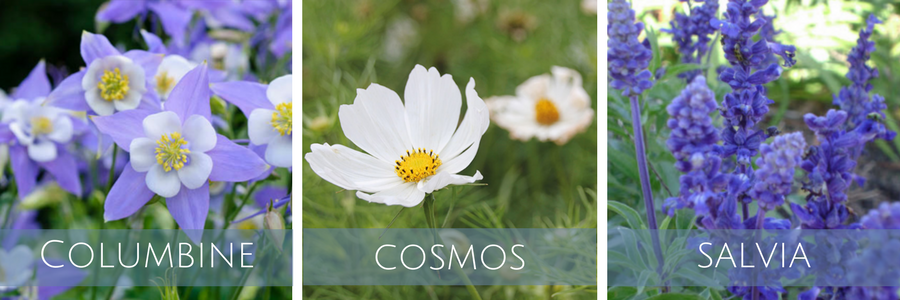
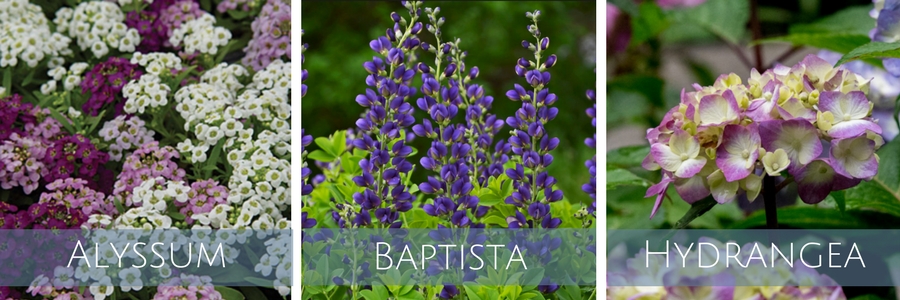
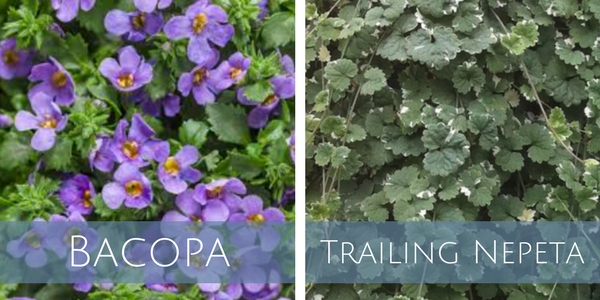
These are the one’s I chose for the containers I wanted to refresh. I have to admit, I am terrible at plant and flower names, and I hope I’ve got all of these right. Some of those little plastic markers were missing and I spent more time online looking for the names of these guys than actually planting!
One thing I always make sure to have is a couple types of low vegetation or flowering plants that will spill over the edges of my container as they grow. The two below are great options.
We plant mostly white, pink and purple annuals and perennials in our garden…and when I say we, I really mean my husband because he does most of the garden planting and I’m in charge of the containers. Thankfully, he’s happy to stick with my color choices : )
I have to confess that I may have stolen a couple of the newly planted annuals in our garden for my containers, but he probably won’t notice!
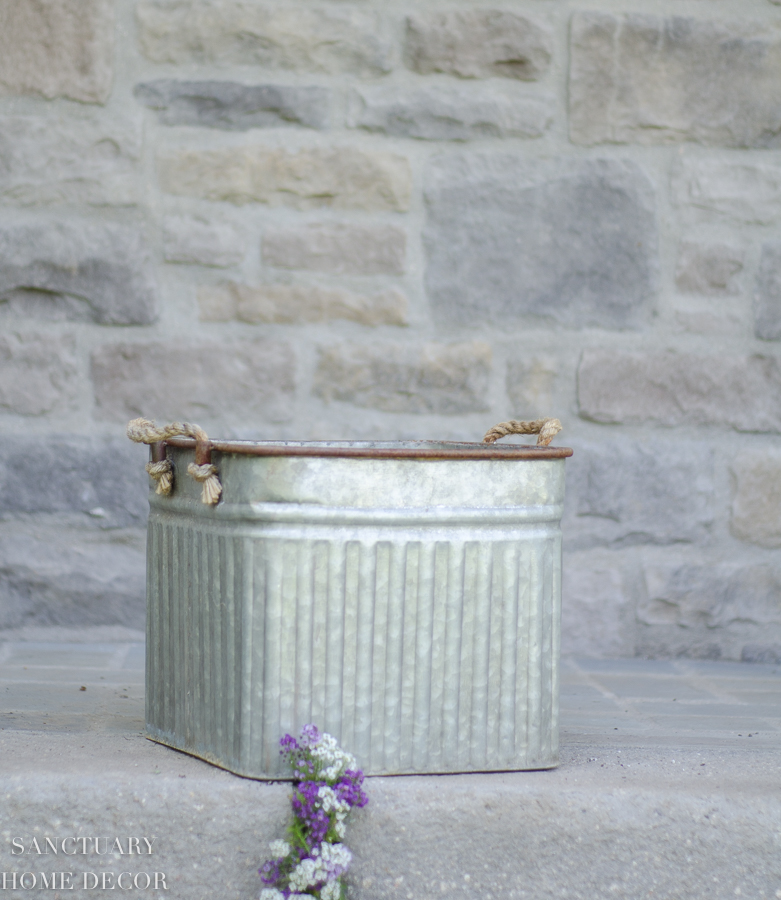
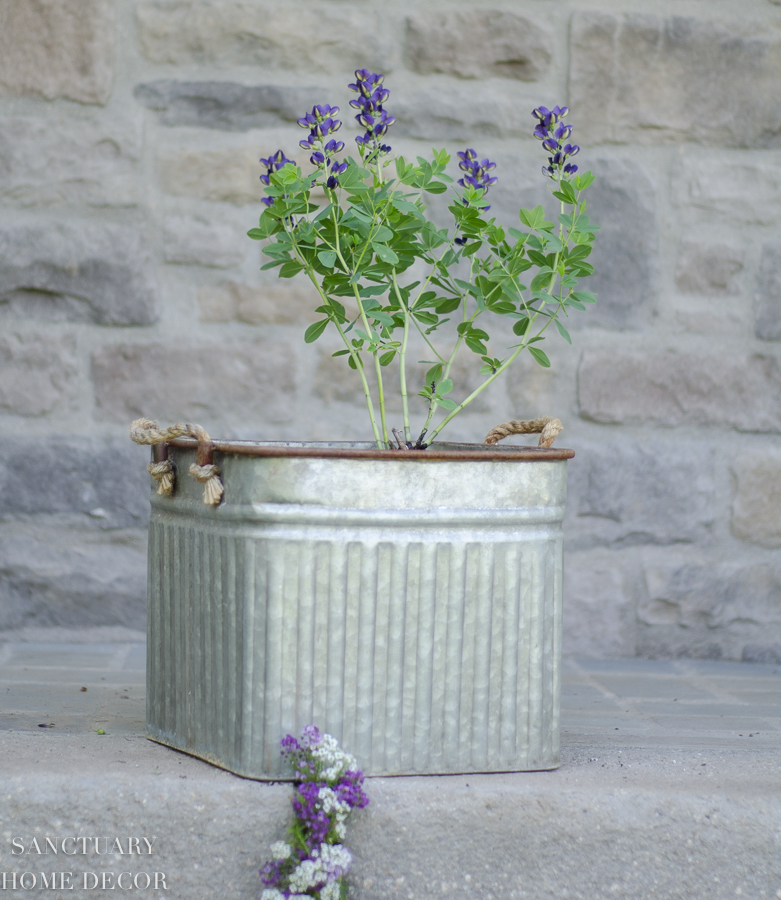
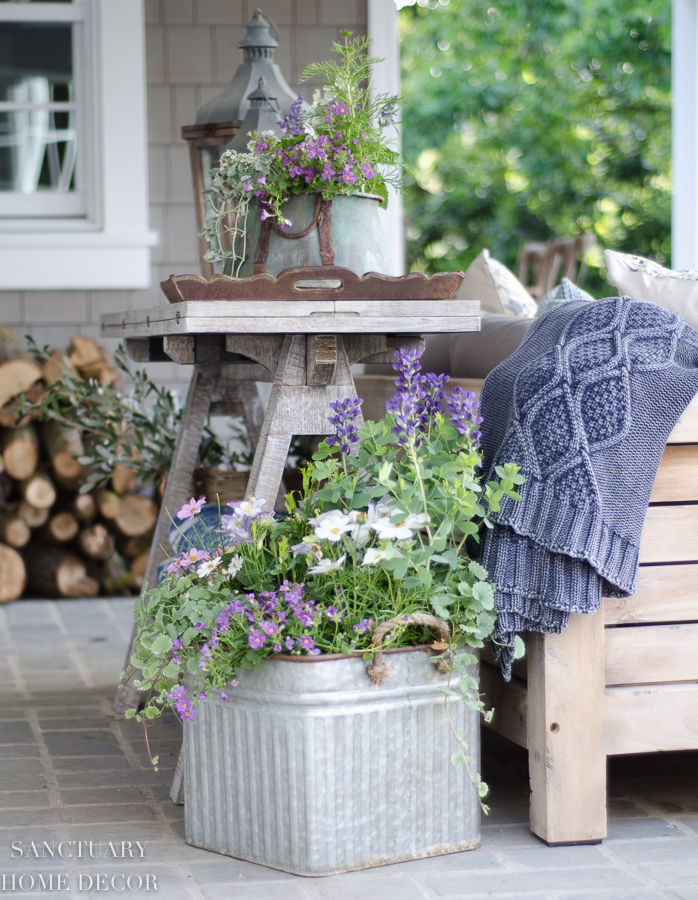
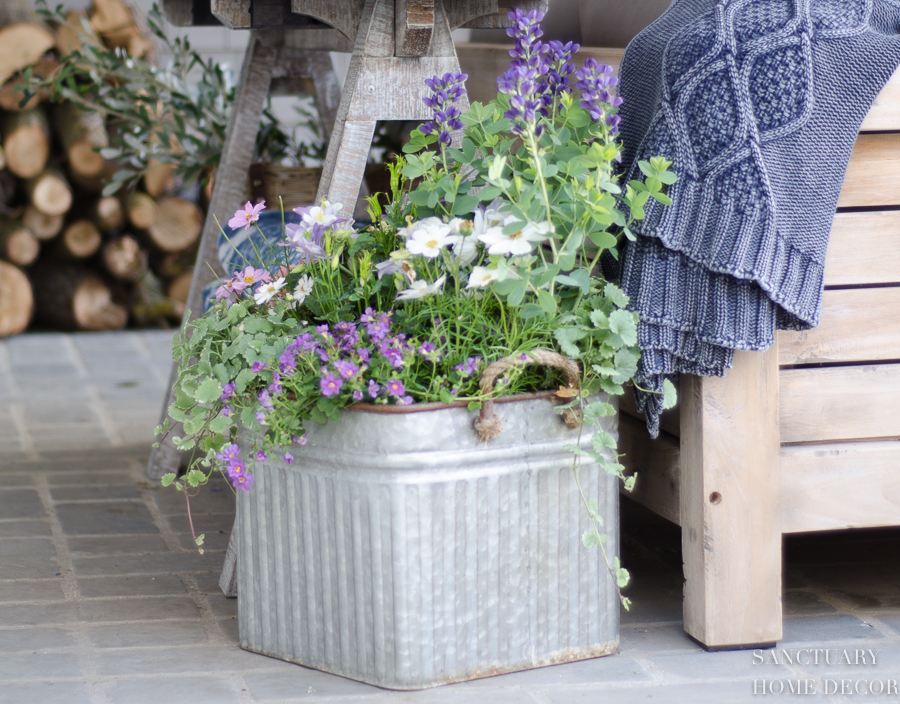
This galvanized container had a sad dried up hydrangea in it from last year, so it definitely needed a major makeover. I started by placing this one gallon baptista, (wild blue indigo) in the corner. In a square container, I always start at the edge and work my way around.
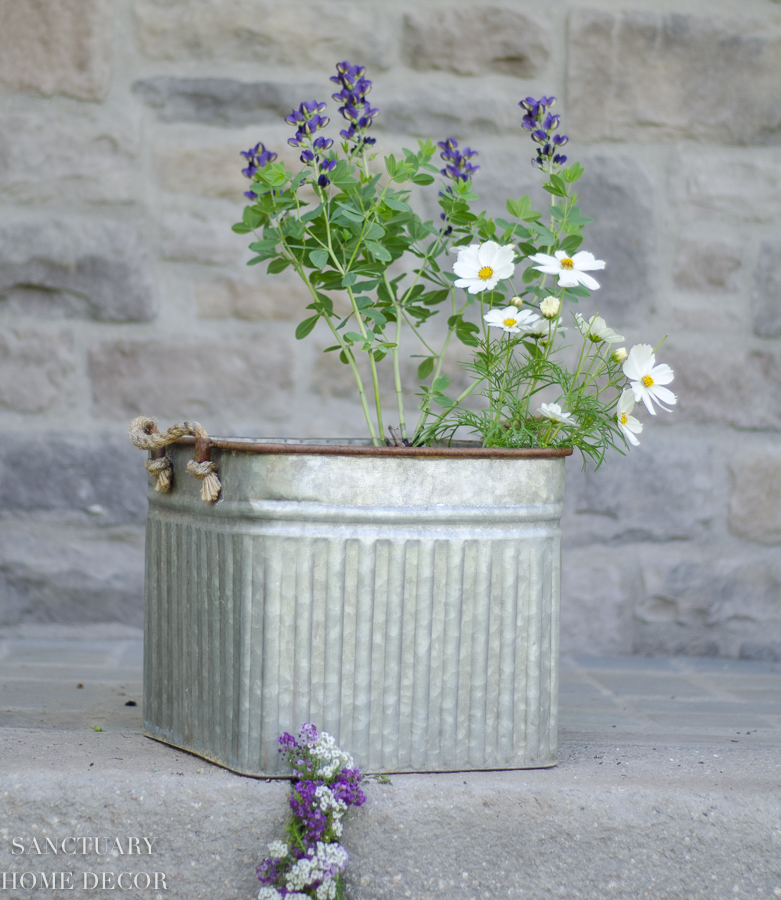
Next I put the cosmos in, at an angle, so that they extended out beyond the edge. I think this is the key to creating a beautiful container. If you angle your plants along the edge, you get a beautiful, lush feel rather that a straight up and down look. I also tucked the columbine in next to the cosmos.
A note about plant heights: You can easily vary the height of your plants by adding or removing dirt. I rarely have a flat layer of dirt in the bottom of my containers. I remove and add as needed to achieve the height I want.

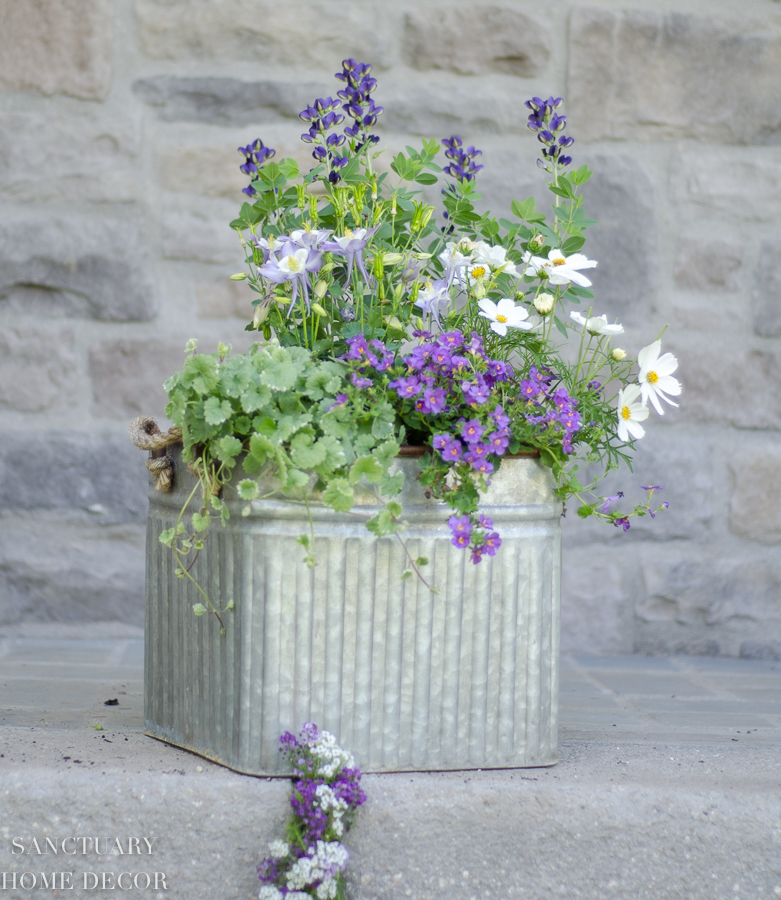
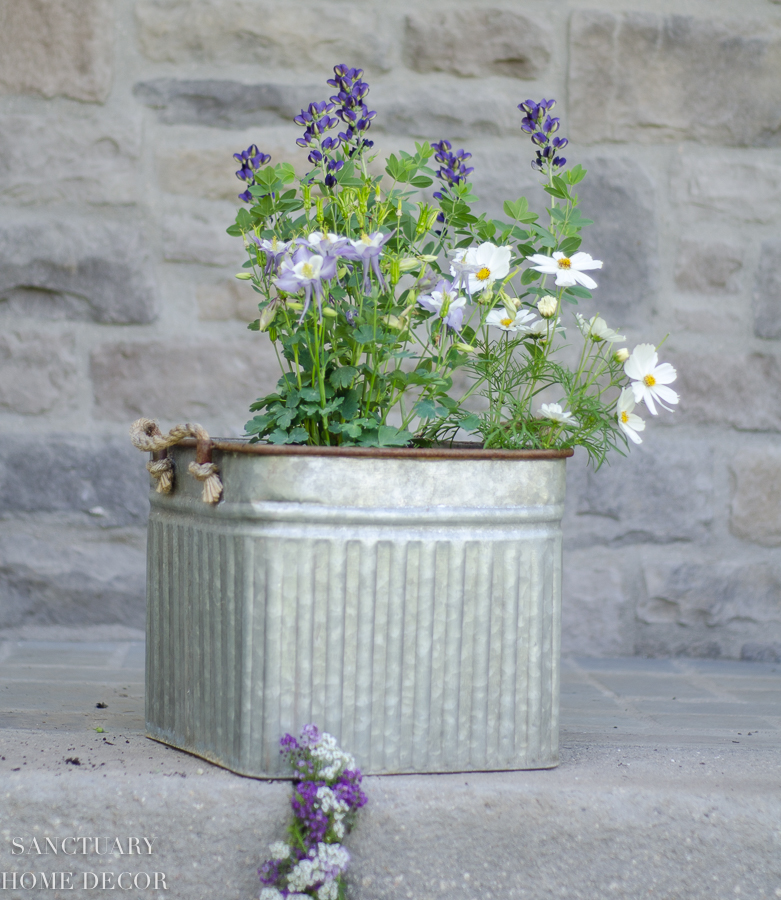
I definitely wanted the look of plants spilling over the side of the container, so I used the nepeta and bacopa along the front edge.
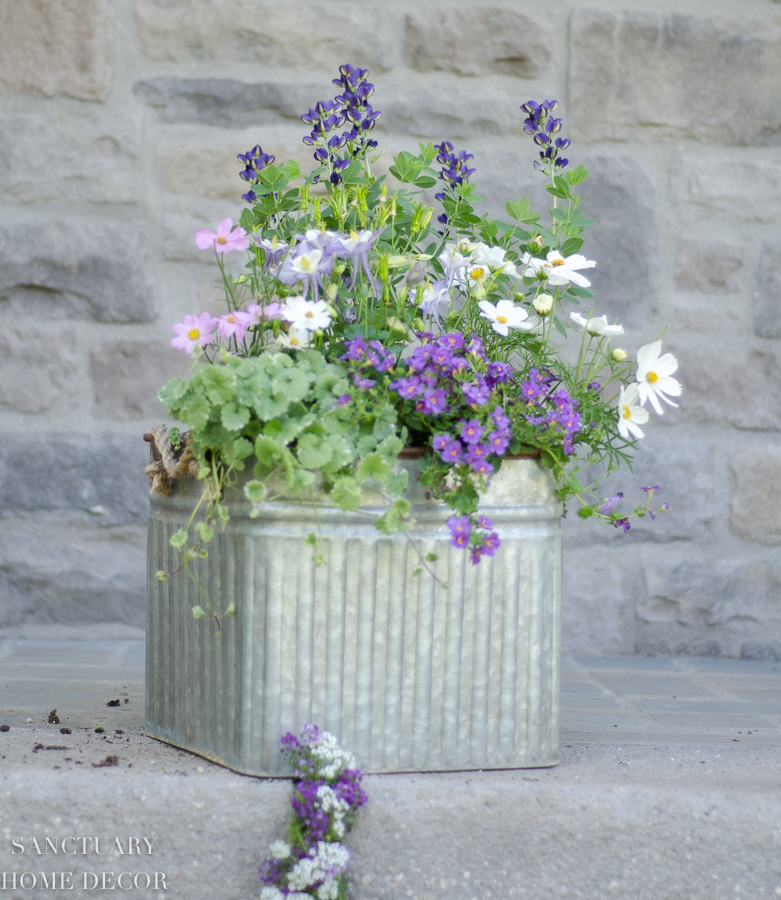
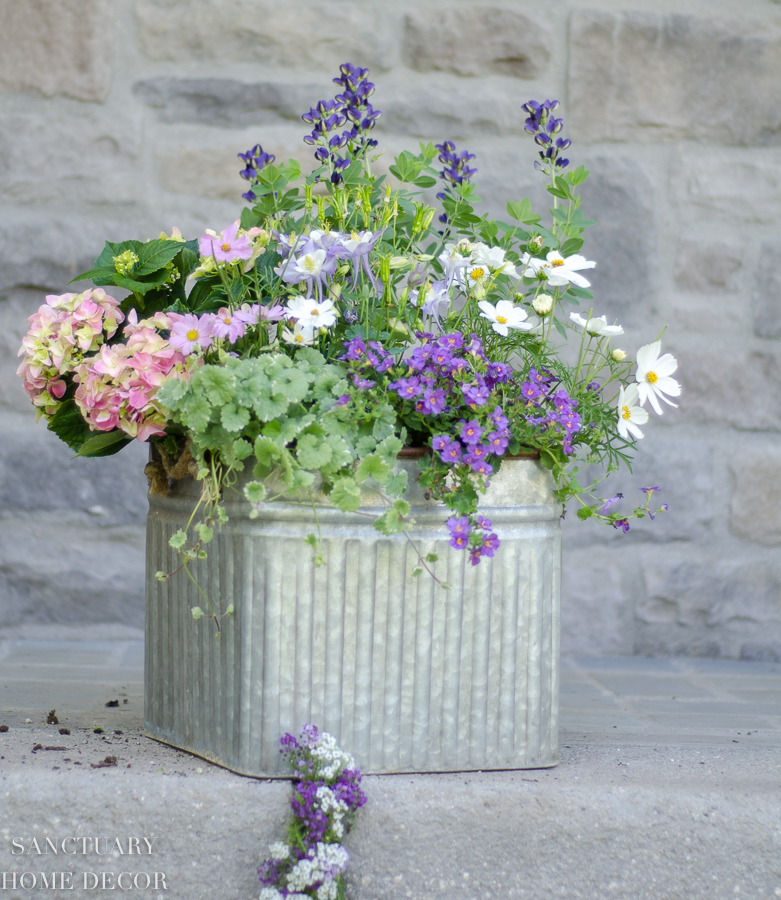
I added another bunch of cosmos behind the nepeta to balance out the colors. Finally, I tucked in this small pink hydrangea in the corner to add a little pop of color. I also angled it so that it extends over the edge. As you can see, I’m not great at the delayed gratification that comes from planting a few plants in a container and letting them fill in. I want it all full and overflowing right away.
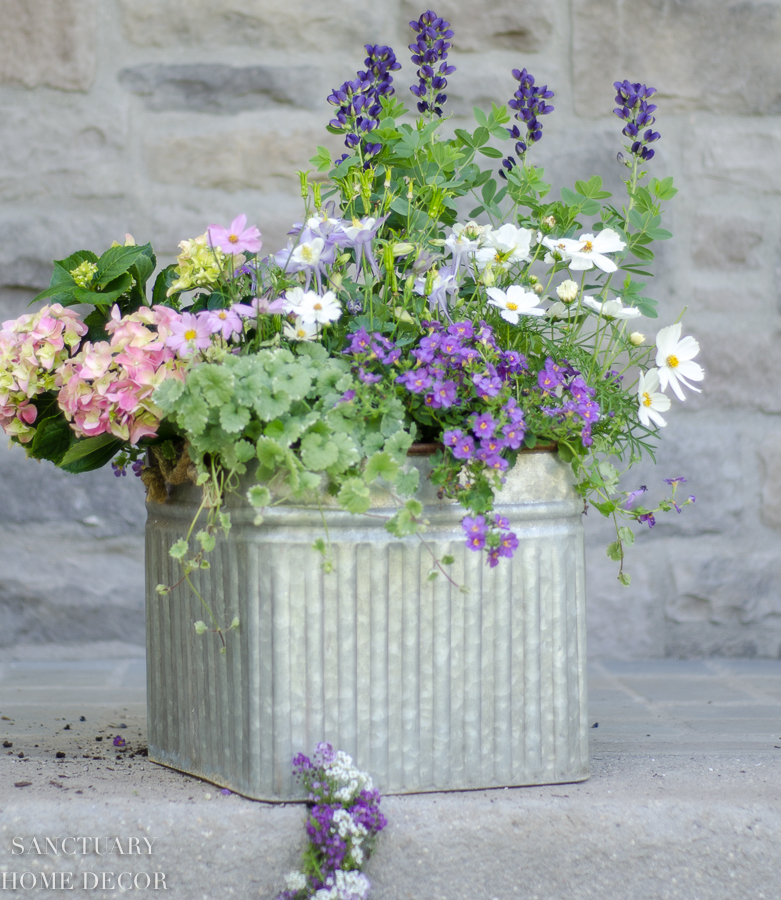
As some of these plants grow, I may have to take one or two out, but that’s a simple fix. In the meantime, I get a container full of spring goodness for my patio.
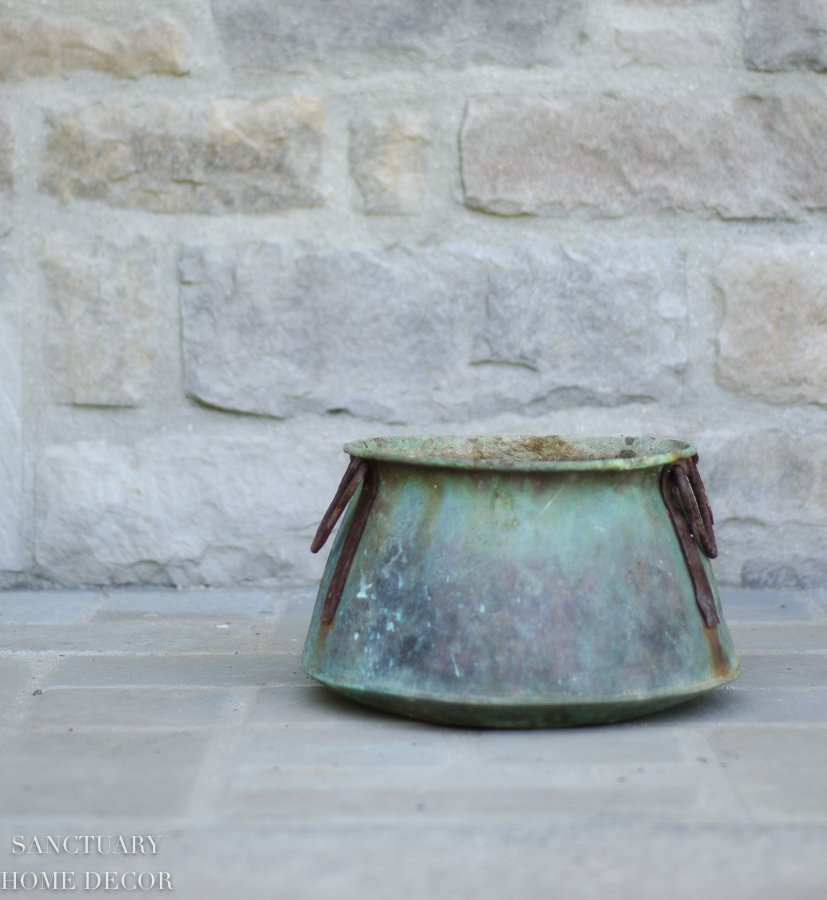
The second container I wanted to fix up was the rusty and tarnished old copper pot. If you follow me at all, you probably know that I love old, rusty and occasionally dented containers for flowers, so planting in the garden is really no different.
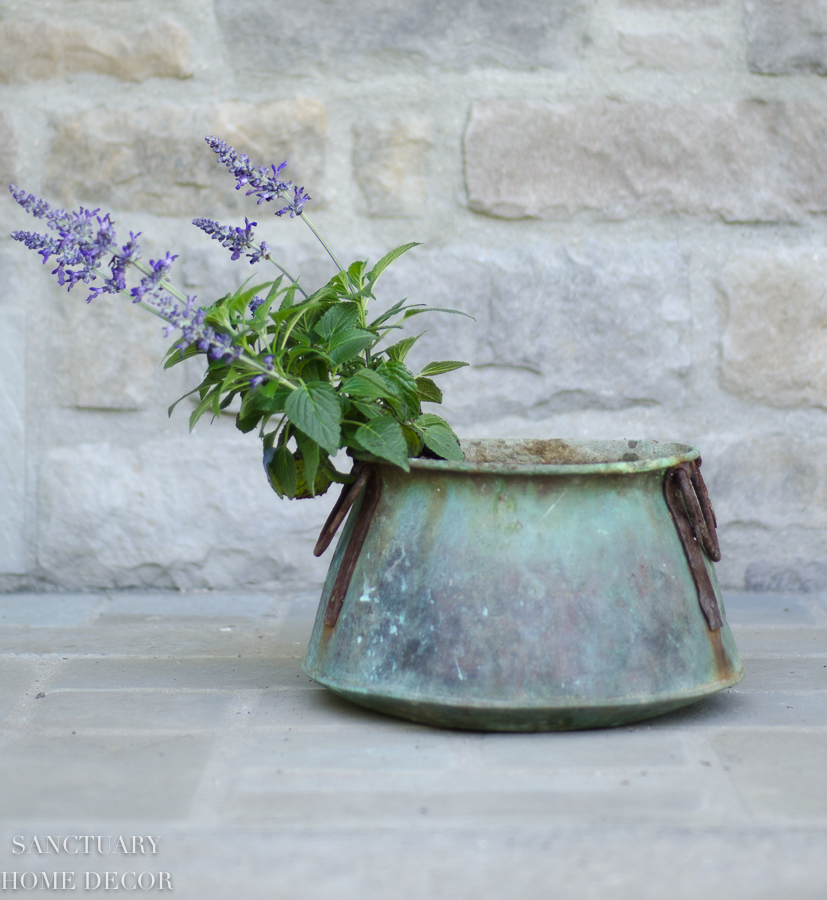
So for this guy, I started with a purple salvia placed at an angle along the edge. Again, this is key to getting that full look in a container. Don’t be afraid to angle your plants…as long as you cover the roots with dirt.
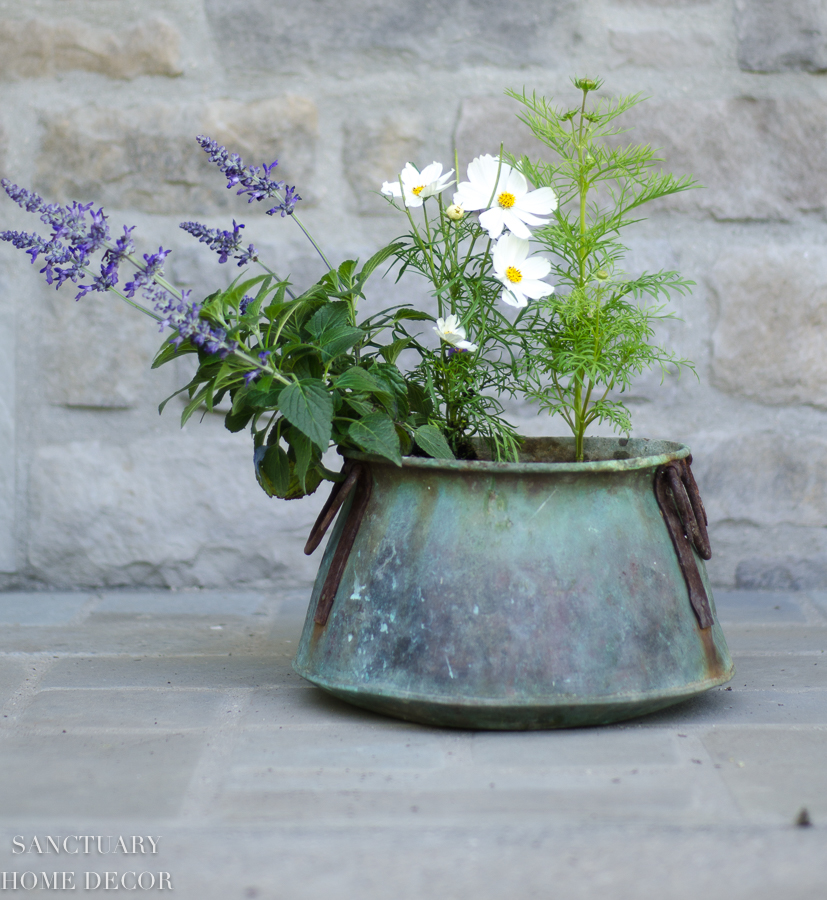
Next, I added in a couple of cosmos toward the “back”. Since most containers sit on steps or near walls, in my mind there is a back and front. If you’re planting a container that will be seen from all sides, it will be important to turn it as you work to make sure it is balanced all the way around.

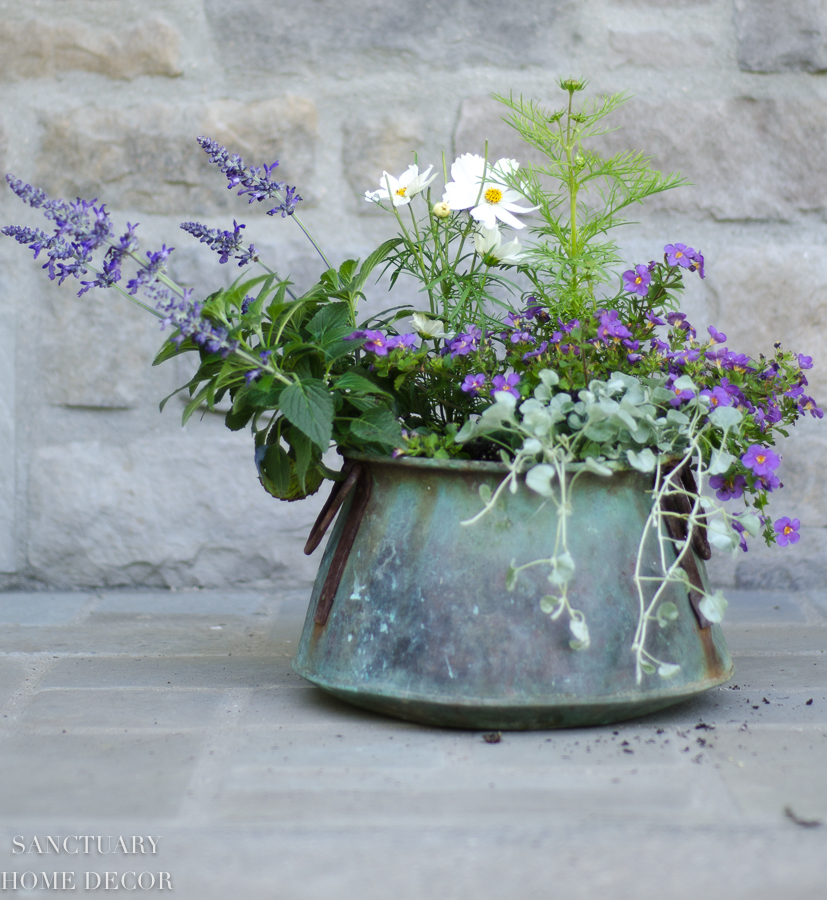
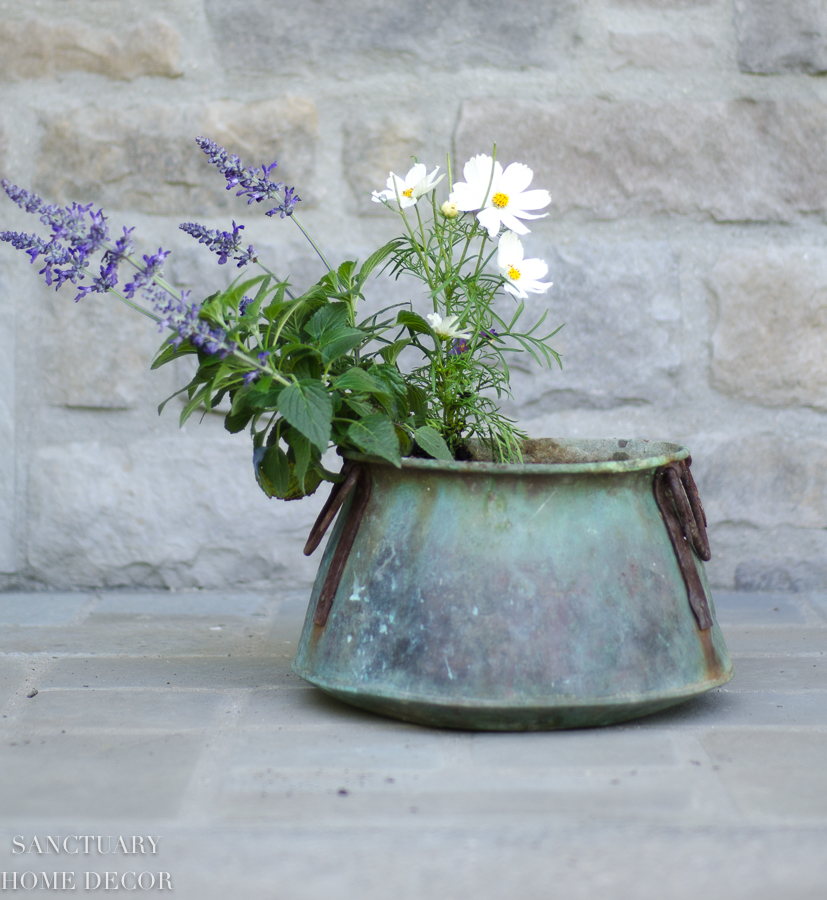
I added in the bacopa next and then put the nepeta along the front edge, spilling over the side. I just so love that look!
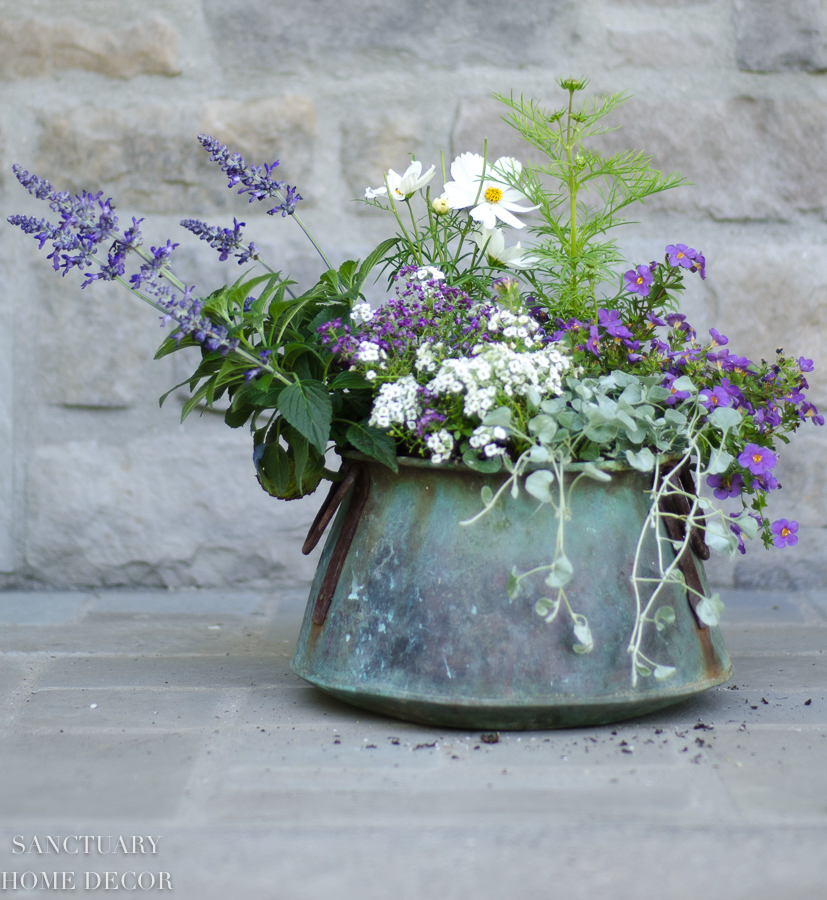
Finally I tucked in a couple sprigs of alyssum to fill in the center. As these guys grow they will also spill over the edge.
And it’s that simple! It makes me surprisingly happy to have these fresh pots on my patio.

I’ve been playing around with a patio makeover all this week so, stay tuned for that reveal next week!
Oh, there are also a couple of affiliate links below for some similar containers, in case you’re interested!
Have a wonderful weekend dear friends!


[show_shopthepost_widget id="3427085"]

Your garden is beautiful, thank you for sharing. Do you have to drill holes in the bottom of these metal and copper pots for the water to drain?
Thanks Courtney-Yes, it’s best to drill holes in the bottom if you’re able.
Hi Karen, I live in the UK and utterly love your site. I live in a sixteenth century cottage with a beautiful courtyard. Thank you for your beautiful ideas.I try and find vintage pots, crates and garden tools to decorate also plants.The basket on your door has inspired me. Regards Eleanor
Thank you for your kind note, Eleanor! I really appreciate it. Your home sounds lovely!!
Thanks for the tip to plant some flowers on an angle. I do alot of container gardening and I can’t wait to try this. I have always put trailing plants near the edge of my containers and planted everything else upright. Your containers are beautiful
Glad the tips helped, Sharon!
Gardening is a great activity and it’s a real pleasure to enjoy the end product. It is nice to see your garden grow over the years and to see the result of all your creativity and hard work.
I love this post. So many people just show you what their flowers boxes look like, you went further and show us how to put it together. And what you used. I love the flowers, just beautiful.
Thank you for this post, just what I was looking for.
Much love, Rose
So happy you liked it, Rose!
Stunning! The combination of flowers in the metal bucket are amazing!